Documentation
7314 Multi-Sensor Vibration Test
MS-7314: Vibration Acceptance Test iOS® version
- Version: 1.48 (b.73)
- Author: SensOS
- Created: 11 nov, 2024
- Update: 20 Dec, 2024
If you have any questions that are beyond the scope of this document, Please feel free to email via info@sens-os.com
Description
This test allows the user to collect vibration data from up to 18 accelerometers sequentially. All collected plots can be viewed on the same screen and by pressing on each one of them a full plot will be displayed, allowing the user to zoom and add markers. The collected data can be uploaded to the cloud or sent by email. A pdf report can be also be generated with the TWF and Vibration Spectrum of all the readings.
Compatibility
This module is compatible with the following sensors:
- Sensoteq® Chi
Main Menu
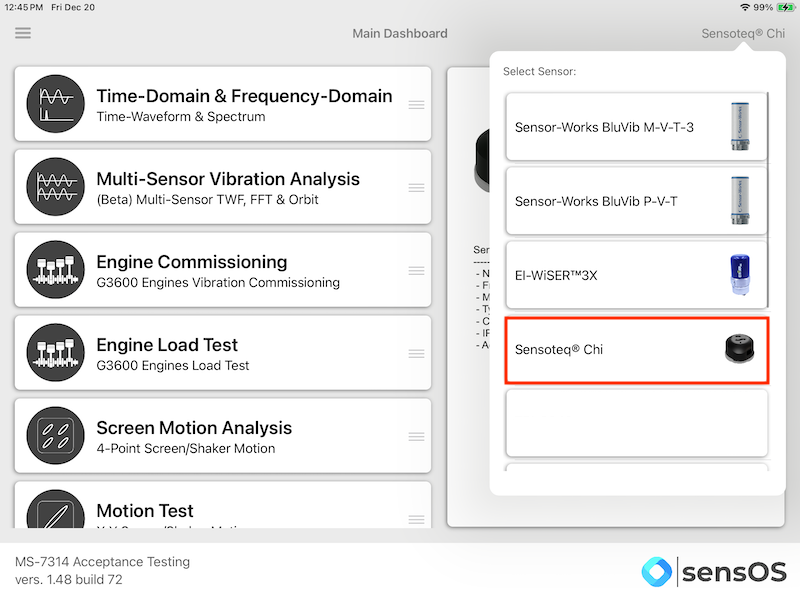
- Tap on the Sensor name button to open the list of available sensors, and select the sensor type from the list
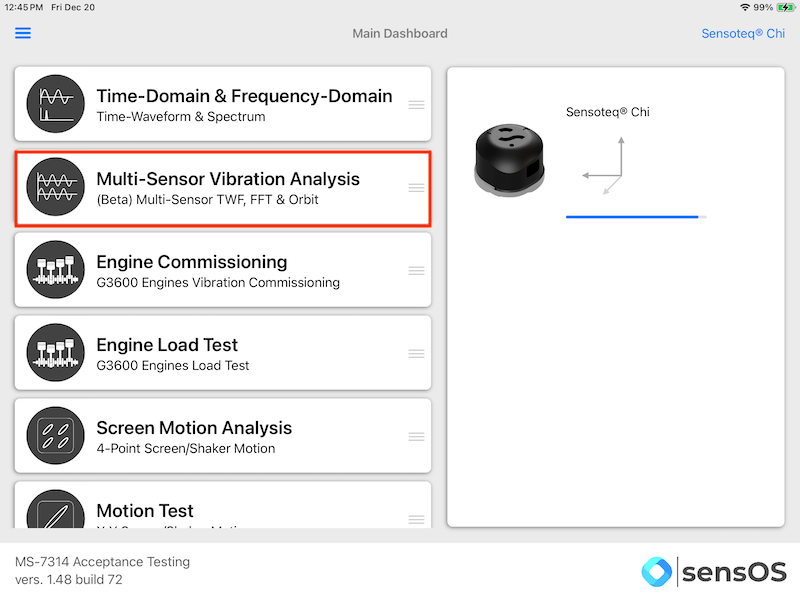
- Select the Multi-Sensor Vibration Analysis option from the list.
Note: The user can change the order of the functionalities in the list by dragging it from the right button on each cell
Multi-Sensor Setup
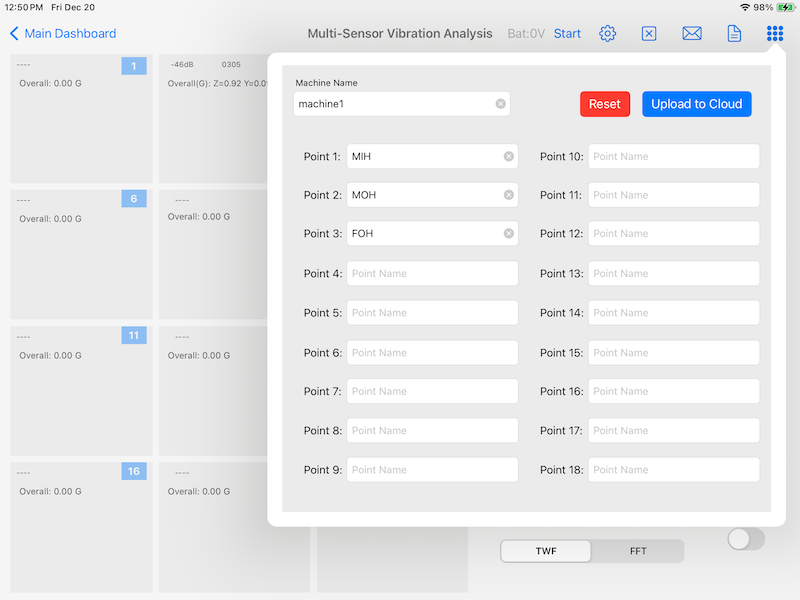
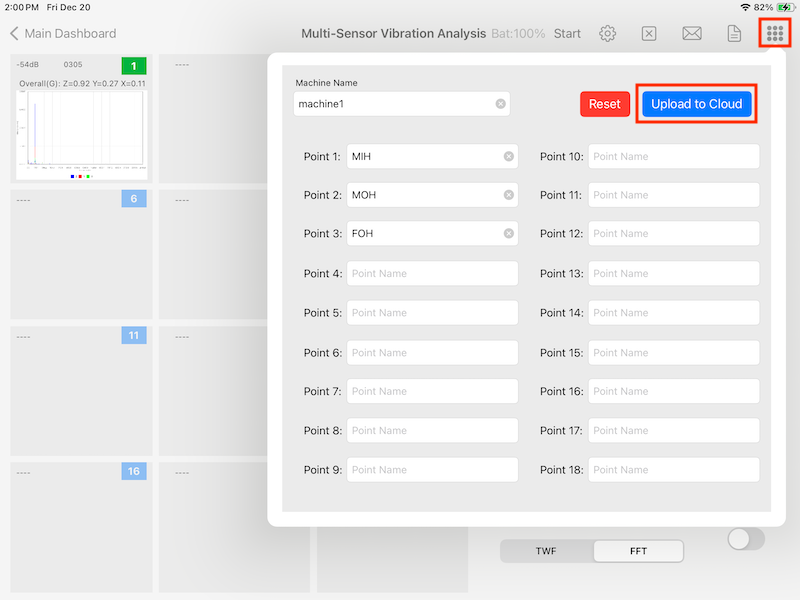
- After opening the Multis-Sensor Test screen, a popup will appear. Enter the name of the machine and the name of all the points to be measured. The "Reset" button can be used to erase all the entries. The "Upload to Cloud" button will be used later to sync the collected data to the cloud. Tap outside of the popup screen to close it.
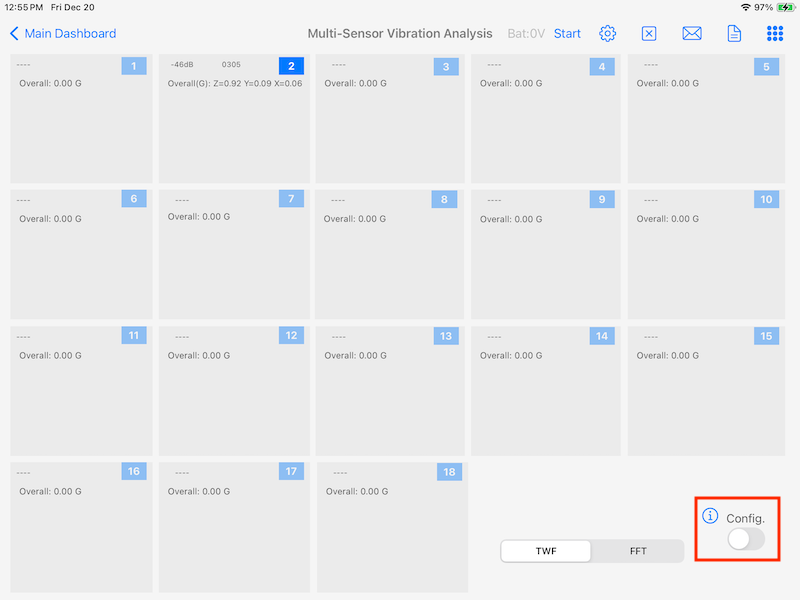
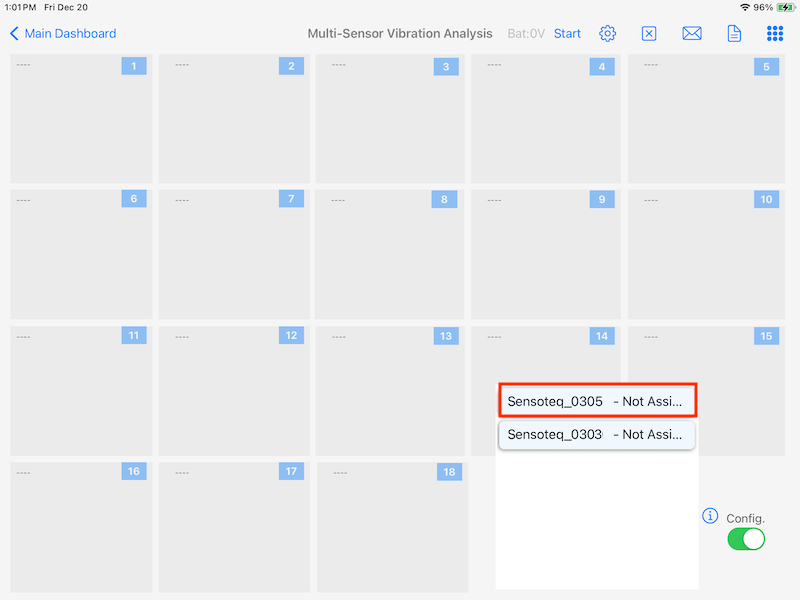
- To setup for the first time the sensor and assign them to the points, set the "Config" switch to ON. (The "i" button can be used to pop the help screen -internet connection is required).
- Scroll the sensor list and Tap on a Sensor to select it.
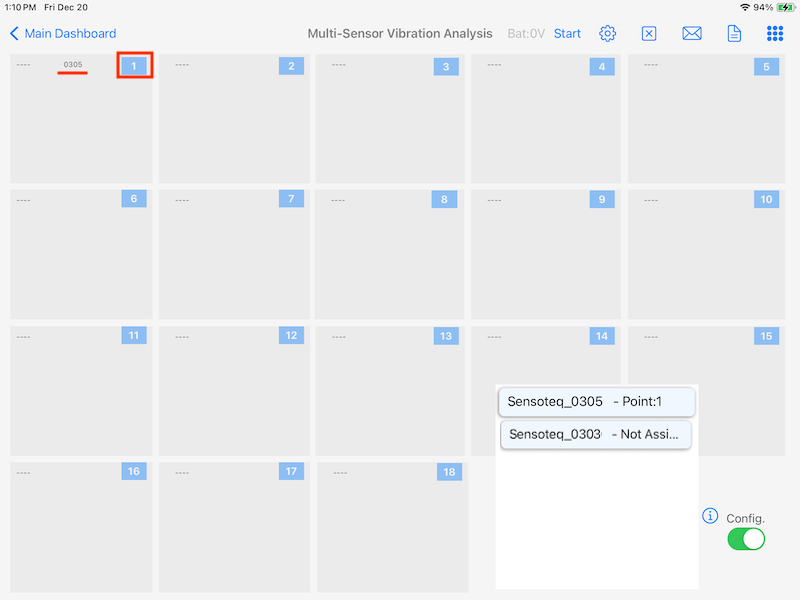
- Tap on the Point's blue button to assign the previously selected sensor to the point. The sensor name will now appear on top of the box. Repeat this process to assign all the available sensors to the points and once finished set the "Config" button back to the OFF position.
- All the available sensor will appear on the screen (blue # squares will be solid blue). The signal strength for each sensor will appear on the top lef corner of each point's box.
Multi-Sensor Vibration Test
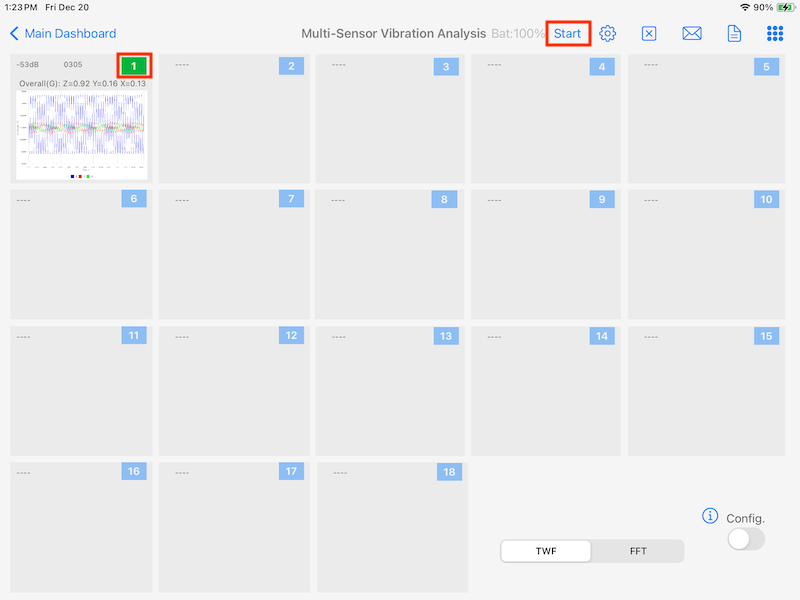
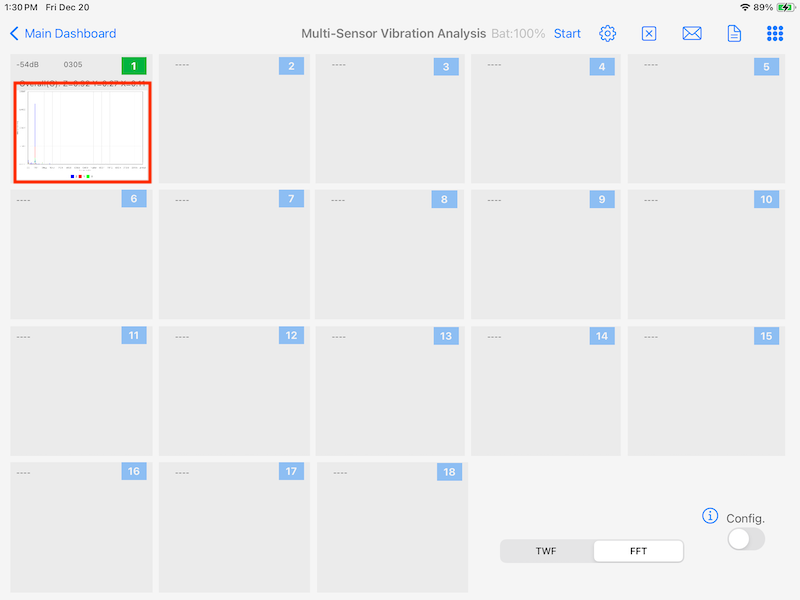
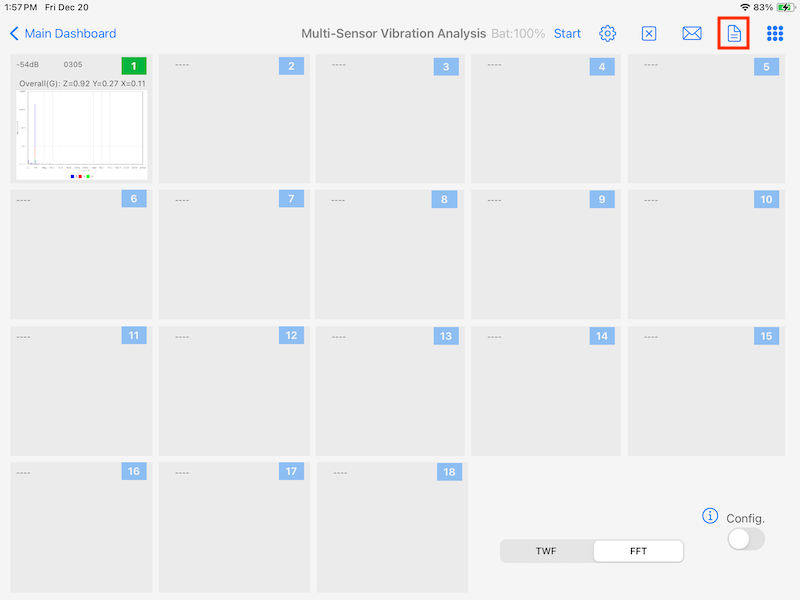
- Place the sensors on the machine in the assigned points. Readings can be taken automatically by presssing the "Start" button. Or one-by-one by pressing on each point's blue button. After reading is taken, the plot will appear on the screen and the blue square button will change to green color.
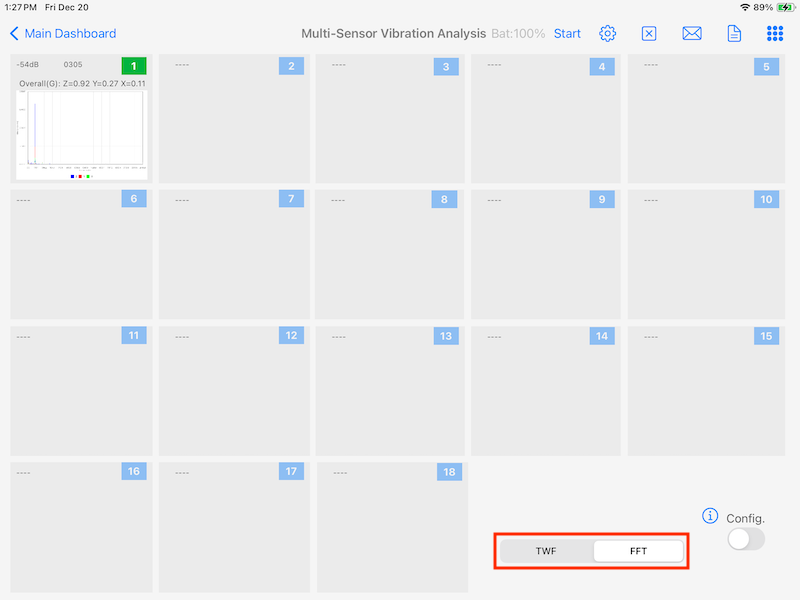
- The default plot type is the Time-Waveform (TWF), toggle the "TWF/FFT" selector to change the dashboard plot to Spectrum and viceversa.
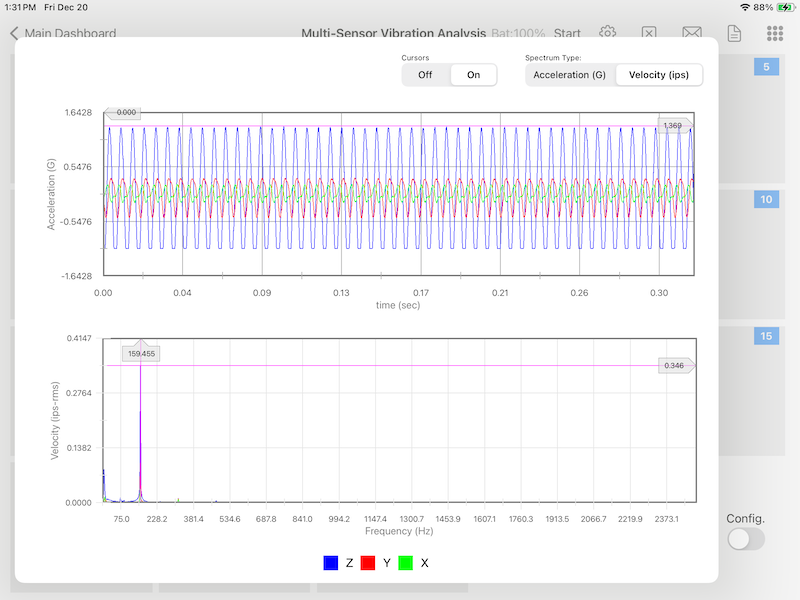
- To view a specific vibration plot, press on each of the points plot to open a popup screen with the vibration data.
- The popup will display the TWF and FFT for the selected point. The user can zoom the plots, add cursors or toggle between the Acceleration or Velocity Spectrum. Tap on the screen outside of the popup to close it.
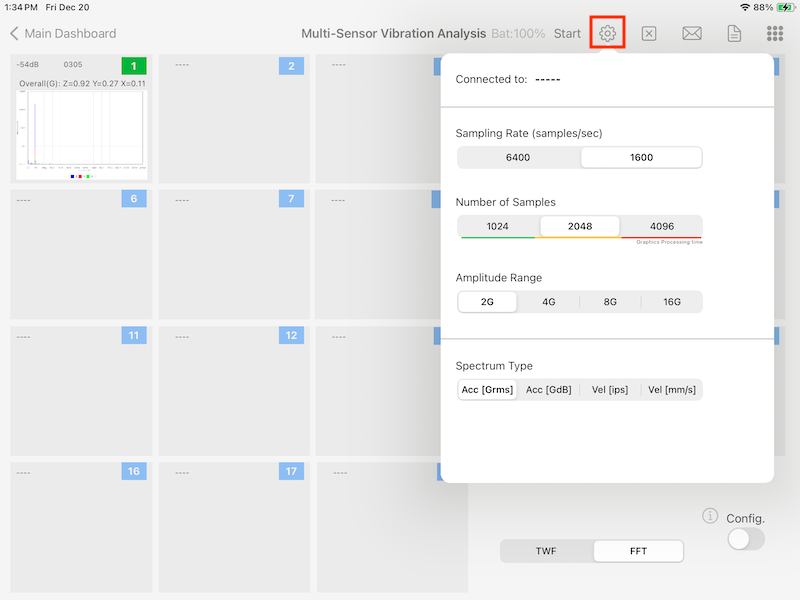
- The sensor settings can be changed before taking a reading by pressing the "Gear" icon. The Spectrum type can also be toggled between Acceleration or Velocity, this will change the spectrum in the main dashboard and the spectrum generated in the PDF report.
- The combination of sampling settings for this sensor are as follows:
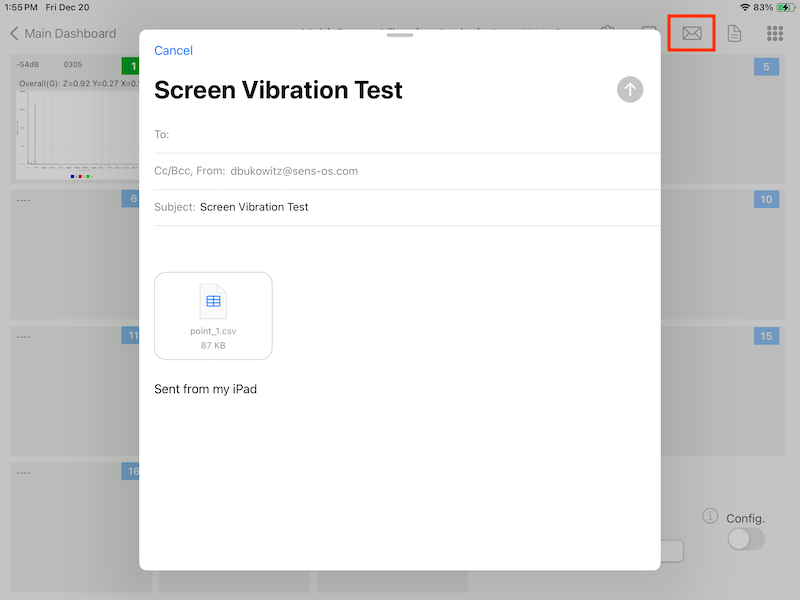
- To email the collected data in csv format, press the email button, a popup screen will show the email template. Enter the email address and send the email.
- To generate the PDF report with the collected plots, press the report button. See more info in: Generating a pdf Report.
- To upload the data to the Cloud Hierarchy, press the "Grid" button. A popup will appear, enter the machine name and point names if they were not assigned previously, and press the "Upload to Cloud" button. Data will send to cloud (The machine and point will be created in the hierarchy tree and data will be uploaded)..
Report
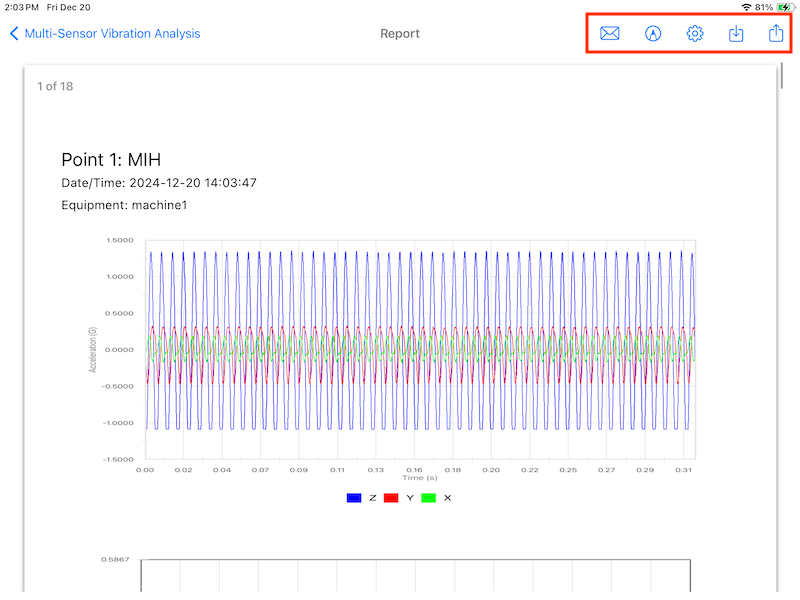
- The pdf report view contains several options in the top bar menu: 1:Send by Email, 2:Markup Tool, 3:Report Configuration, 4:Save pdf locally, and 5:Upload Report to the Cloud bucket.
Changelog
See what's new added, changed, fixed, improved or updated in the latest versions.
Version 1.48 b.73 (20 Dec, 2024)
Initial Release
