Documentation
MultiSens Cloud Hierarchy
MultiSens Cloud Hierarchy Documentation
- Version: 1.02
- Author: SensOS
- Created: 04 Feb, 2022
- Update: 22 Nov, 2022
If you have any questions that are beyond the scope of this document, Please feel free to email via info@sens-os.com
Description
The MultiSens Cloud Platform allows its users to create a hierarchy with unlimited user-defined number of levels allowing ultimate flexibility. Data collected with any of the Smartphone and Tablet applications or online permanent sensors is then stored for post-processing.
The MultiSens Cloud platform allows the creation of routes and interaction with the tablet Apps to upload the route data, off-route data & reports directly.
This section will focus on Hierarchy creation including, Locations, Machines, Components and Points.
Compatibility
The MultiSens Cloud Platform is compatible with the following Apps/Systems/Sensors:
- MultiSens-2234 & 2233 (for route data collection)
- MultiSens-3934, 3934i & 3933 (for off-route data collection)
- MultiSens-4434 & 4433 (for balacning reporting)
- Erbessd Phantom Line (permanent mounted online sensors)
- TPI 7834 and 7838 (for permanent mounted online sensors)
- Sensor-Works Sensors (permanent mounted online sensors)
- MachineSaver Sensors (permanent mounted online sensors)
Adding Locations for Route Data Collection
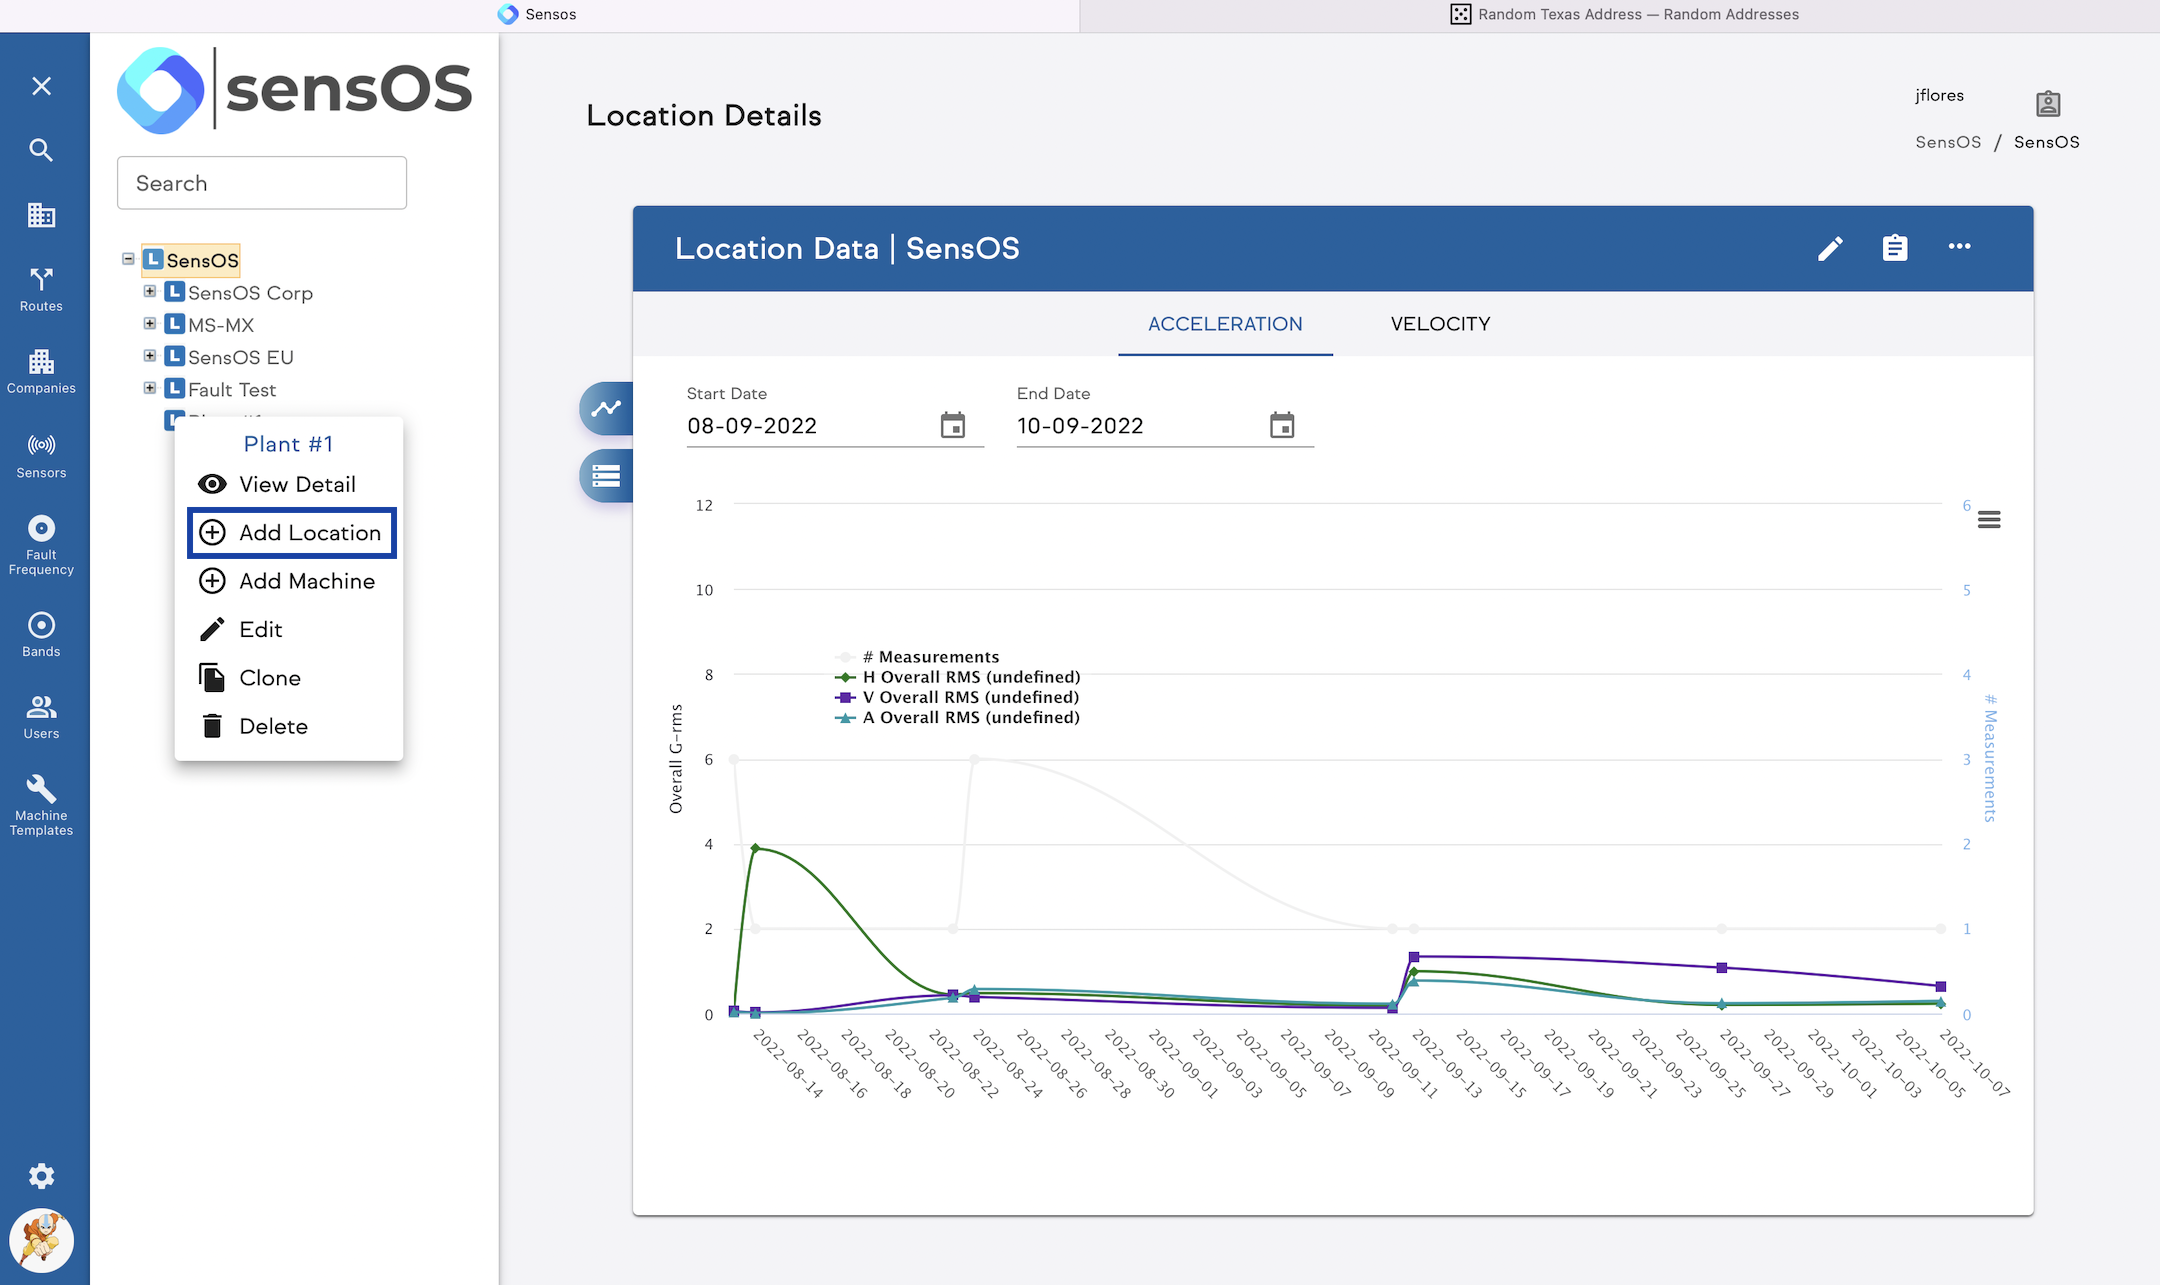
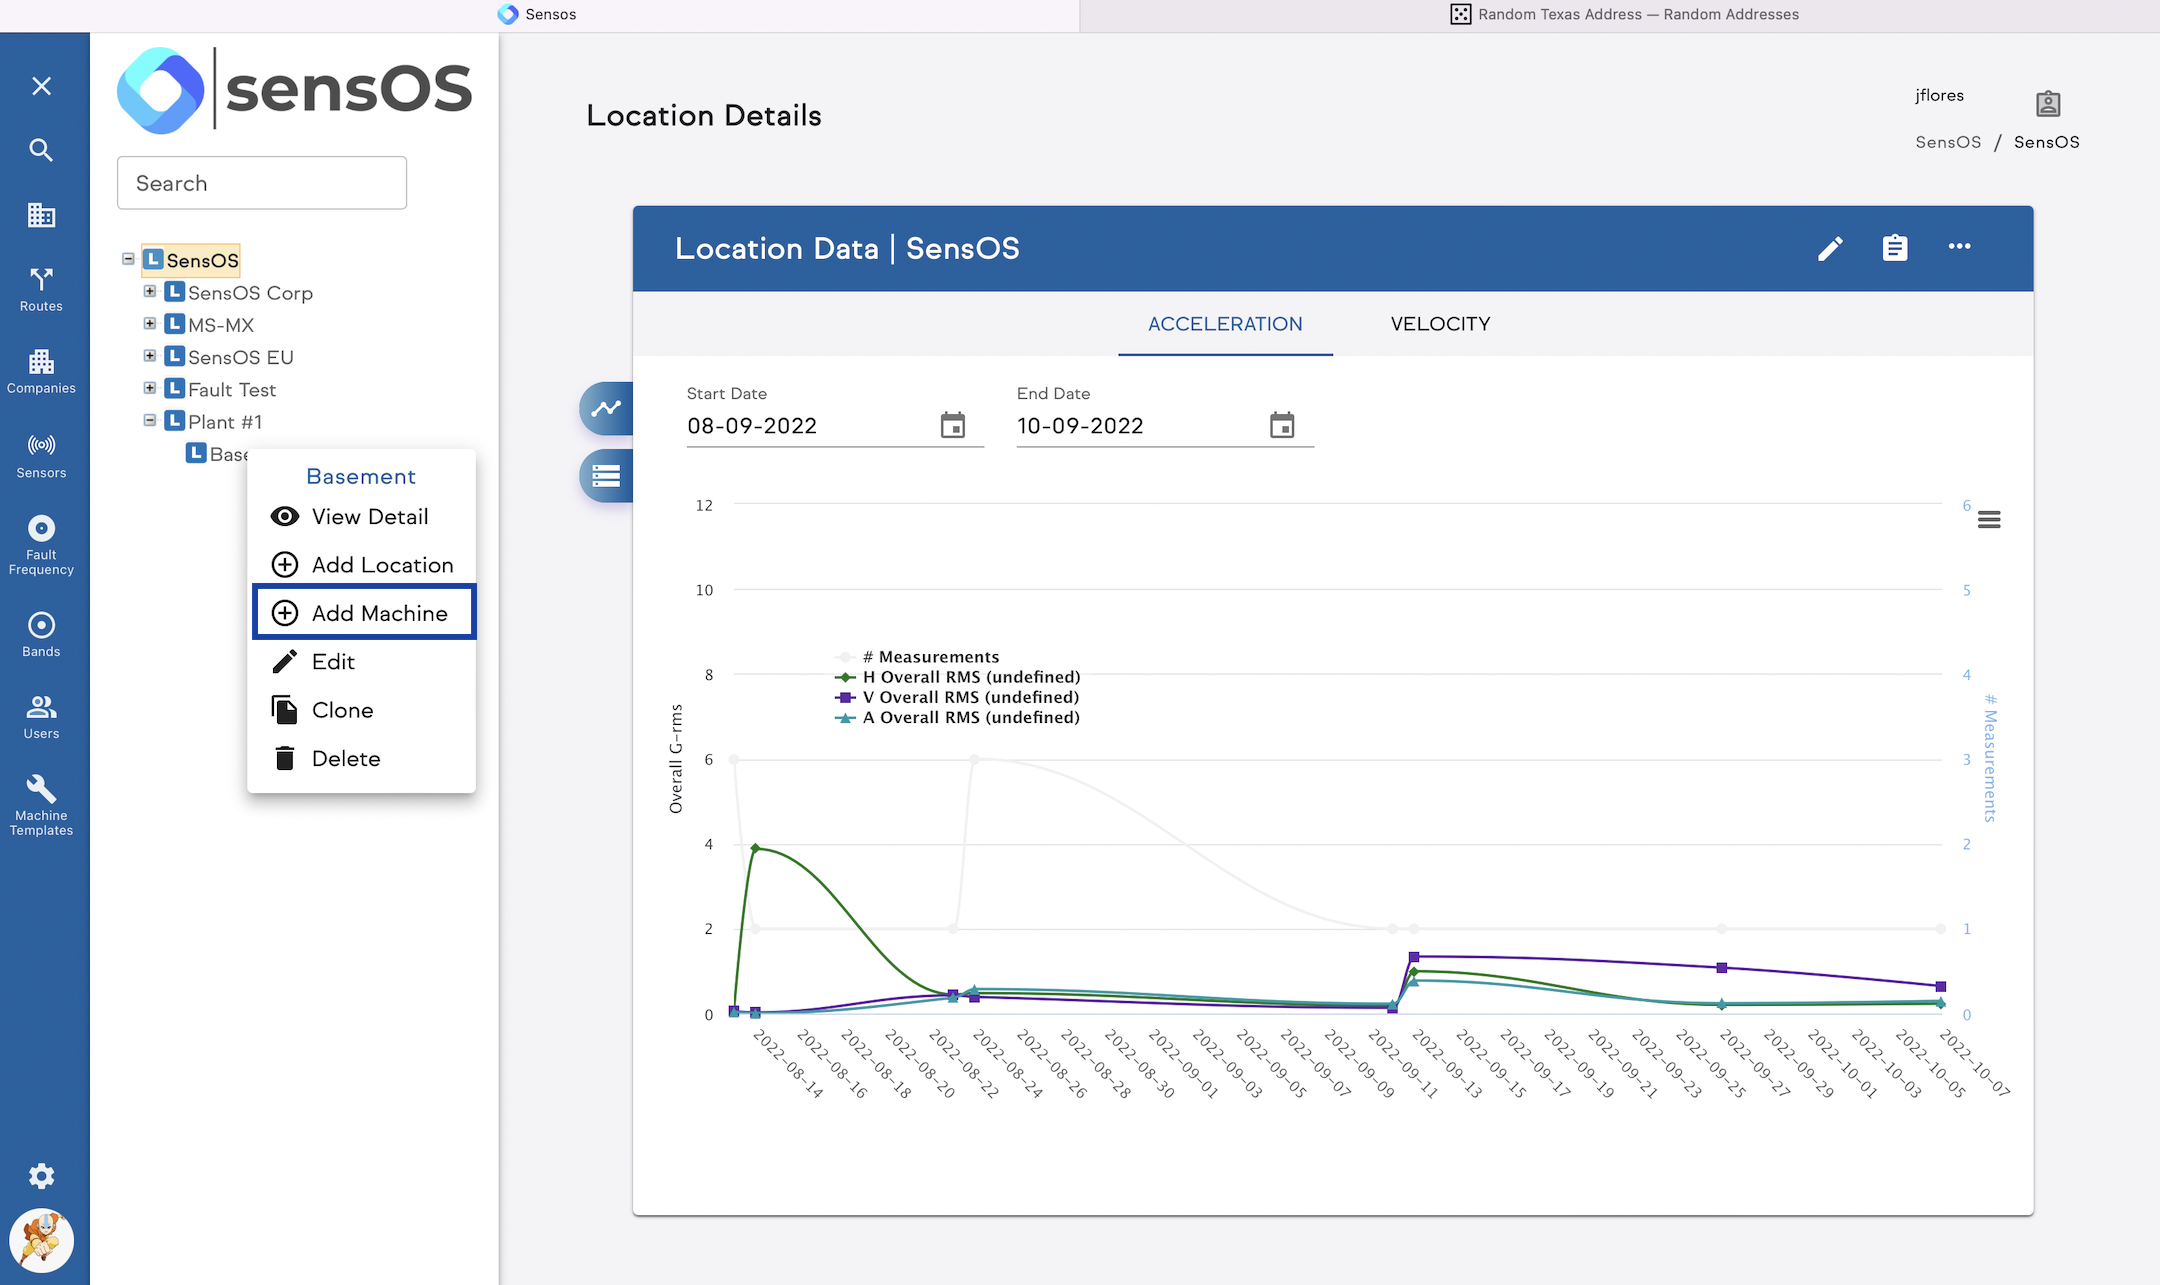
- Hierarchy Tree Manipulation is done by right-clicking on any location, machine, component or Point. A menu opens and depending on the level type different options will be available.
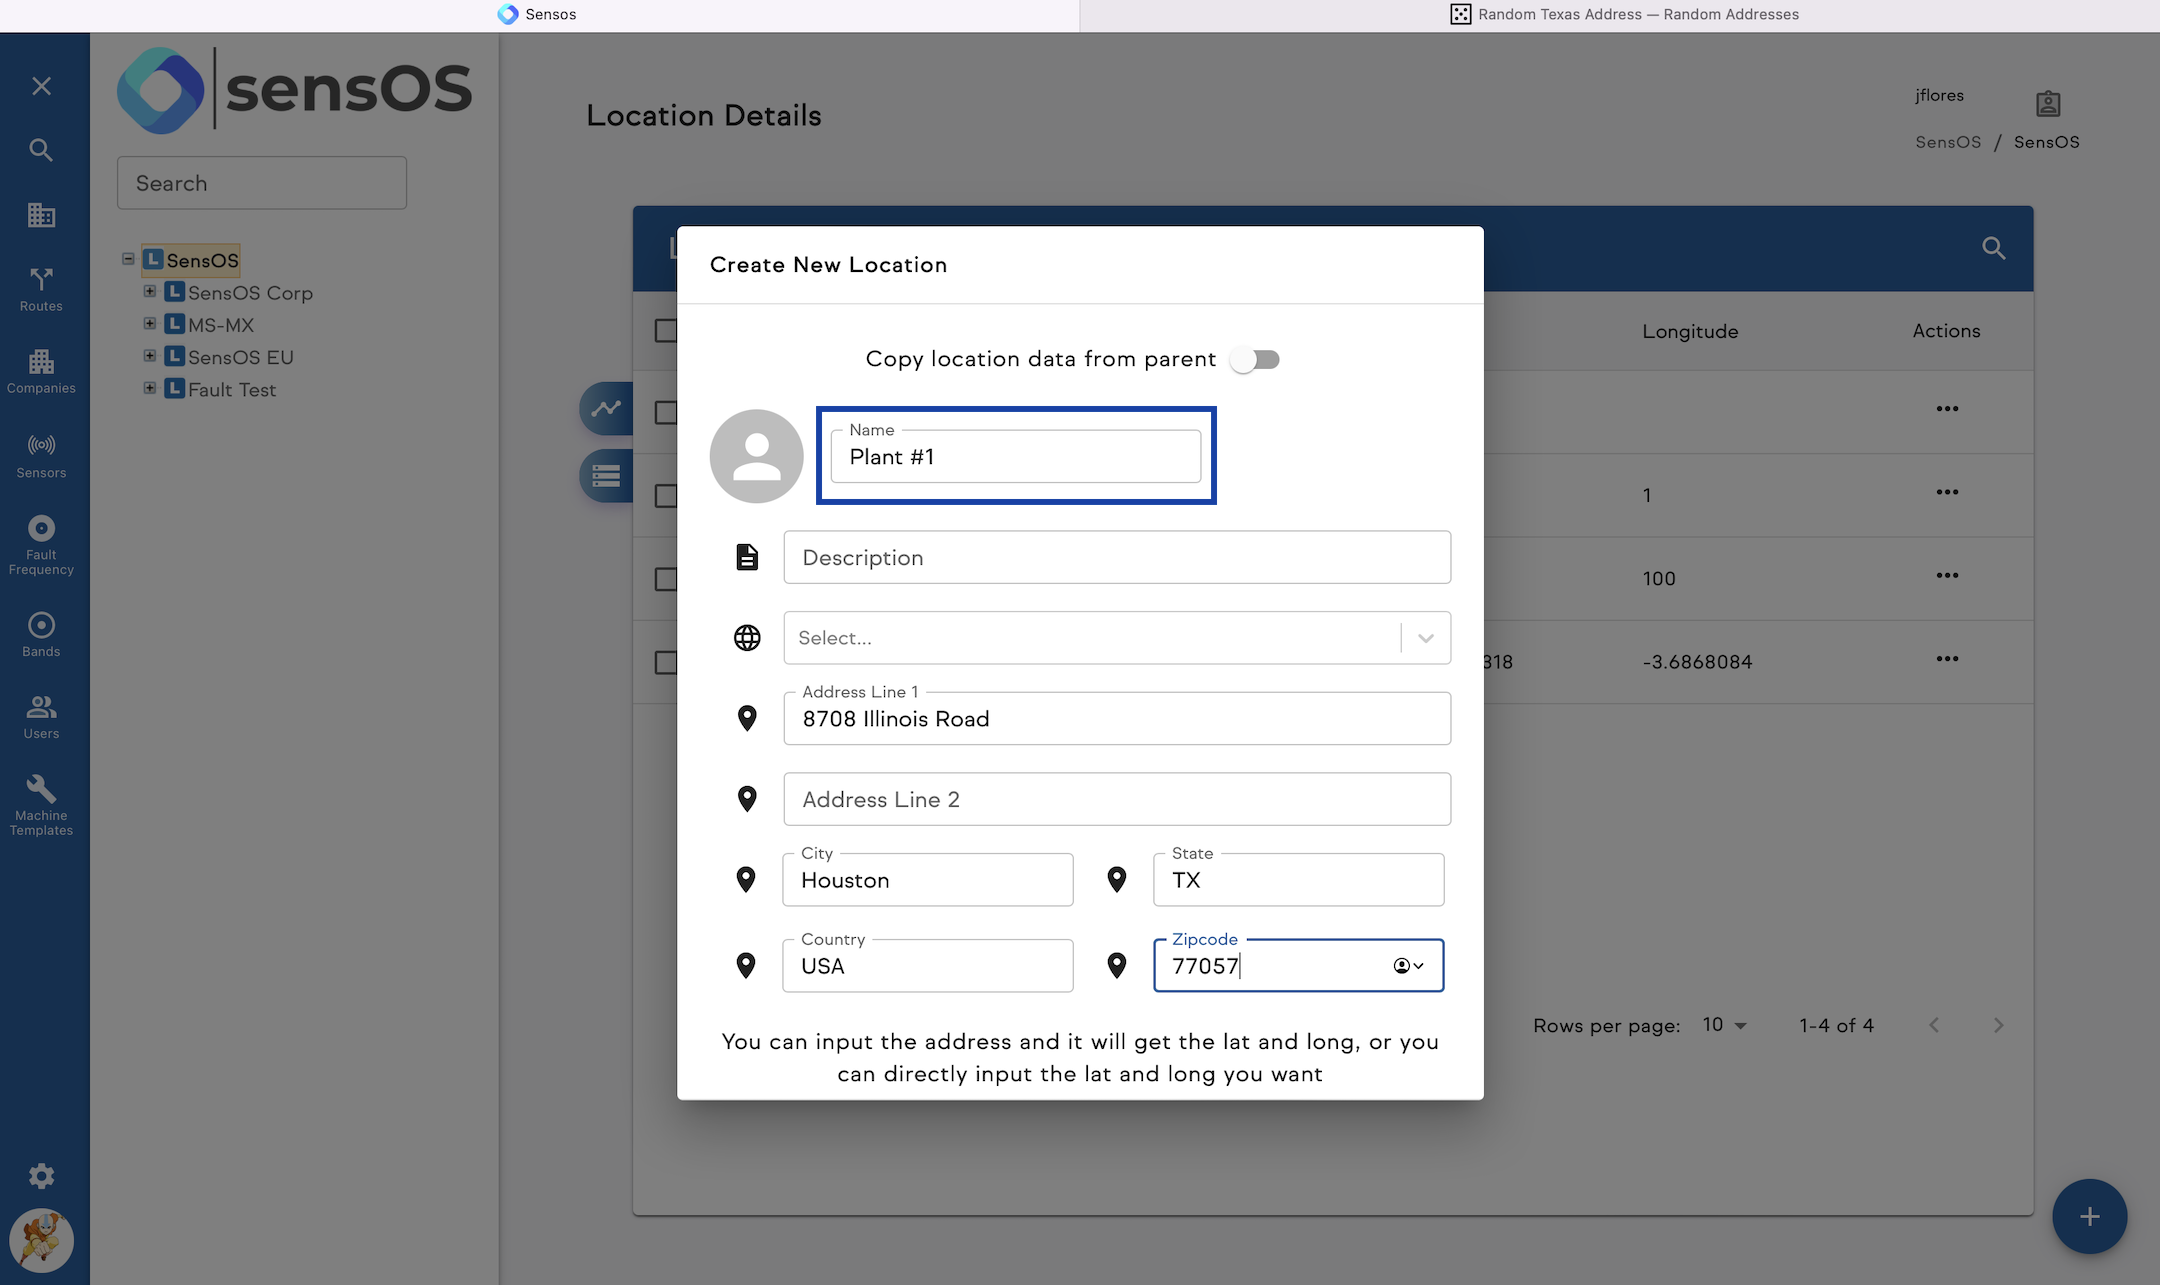
- To Add a Location to Root, click on "Add Location", an unlimited number of locations can be added within locations to fit users' needs. It is recommended to use the minimum number of Locations to optimize experience.
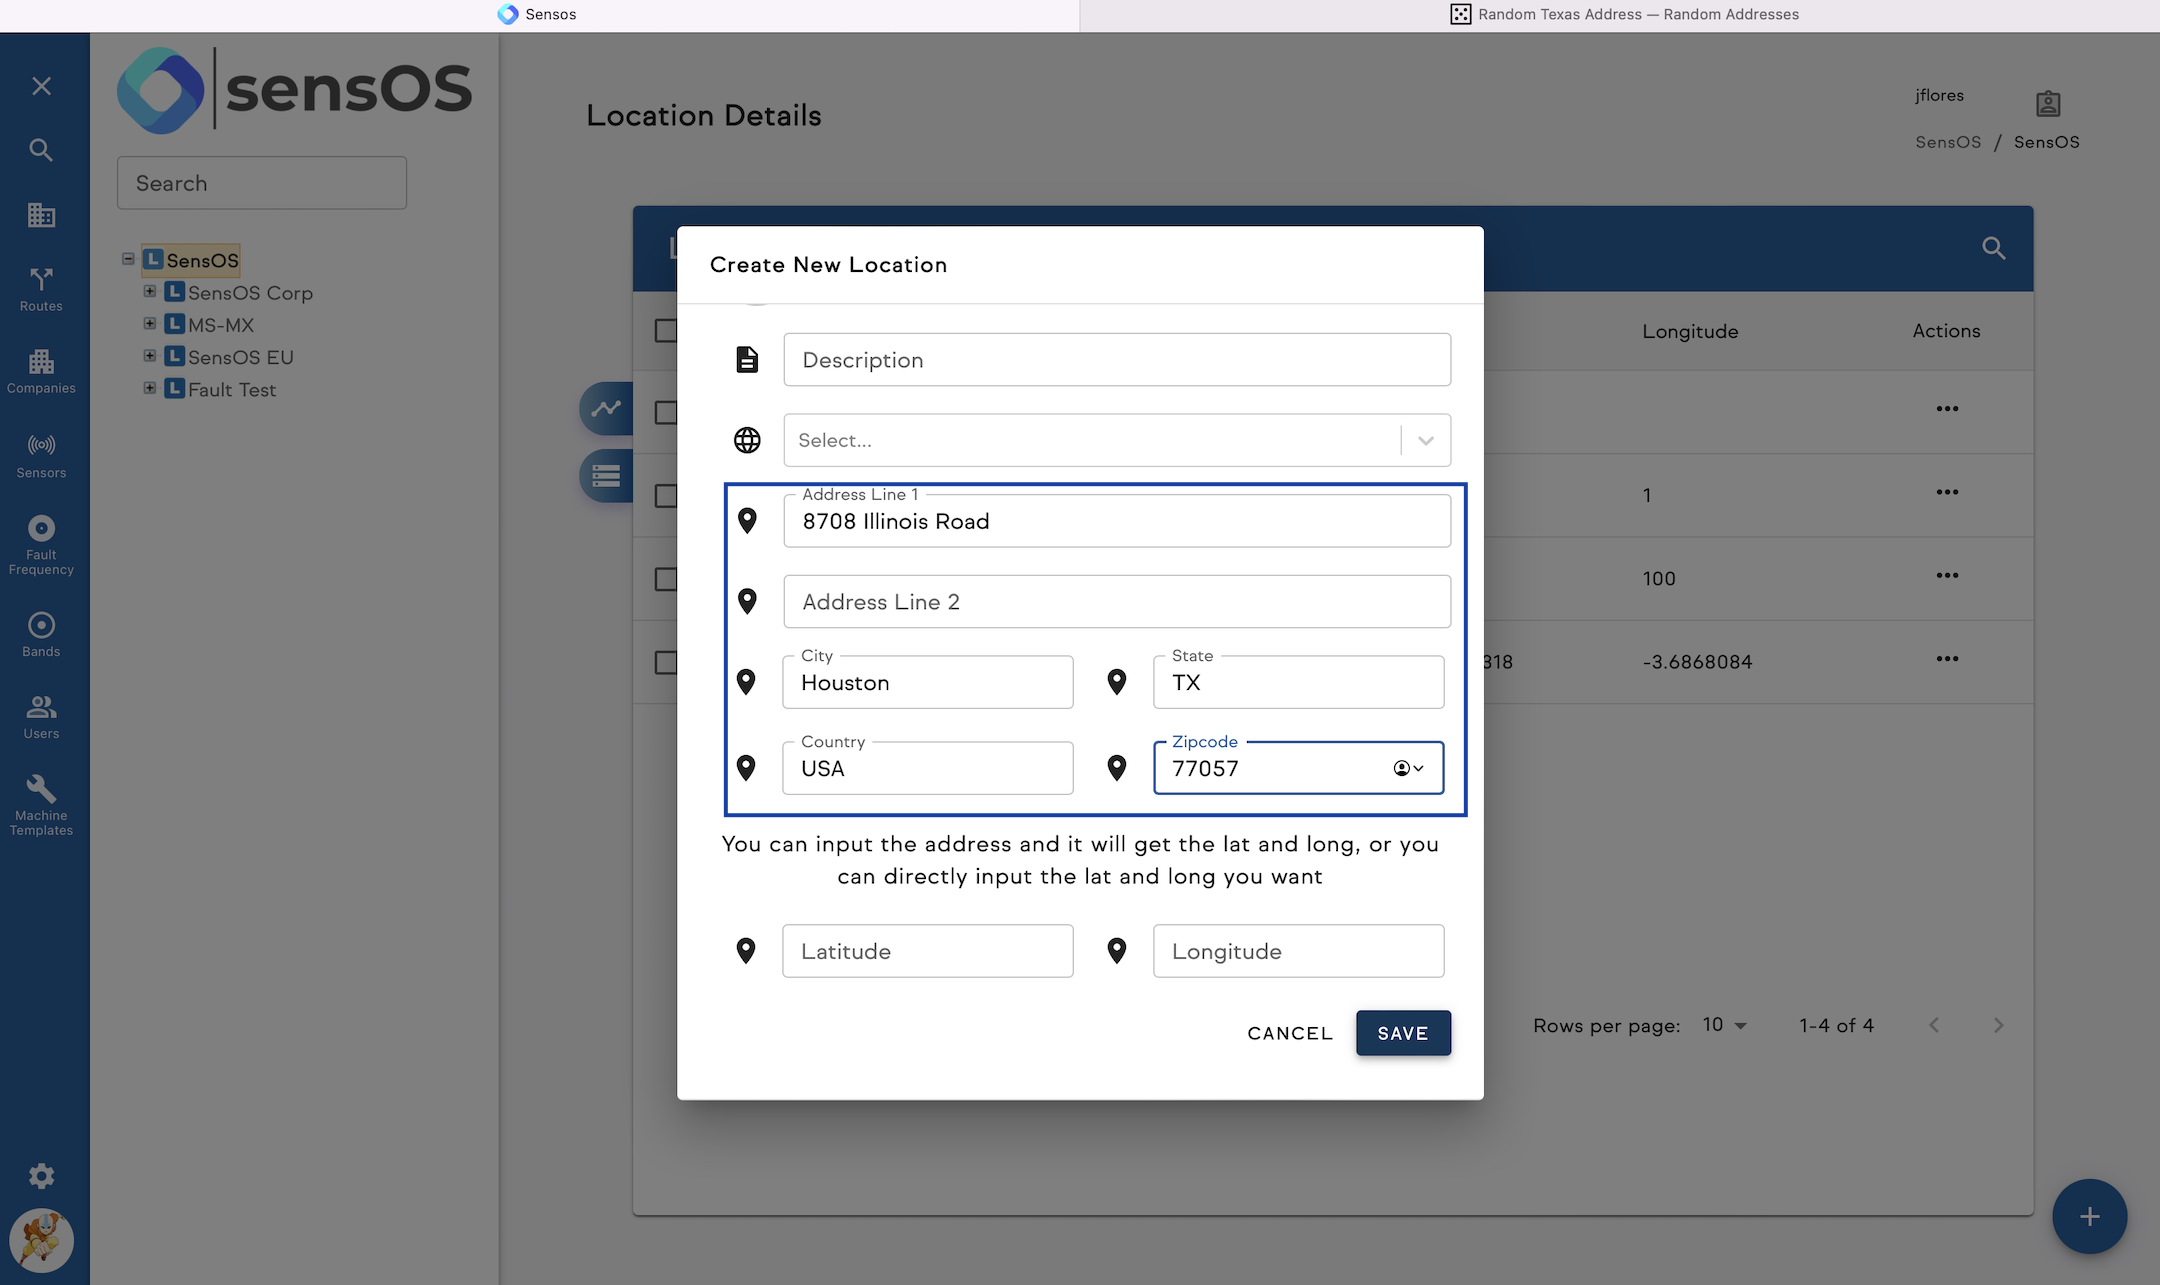
- After "Add Location" is selected, input Location Name (Mandatory) and Address (Optional), the address can later be used within the Apps for directions.
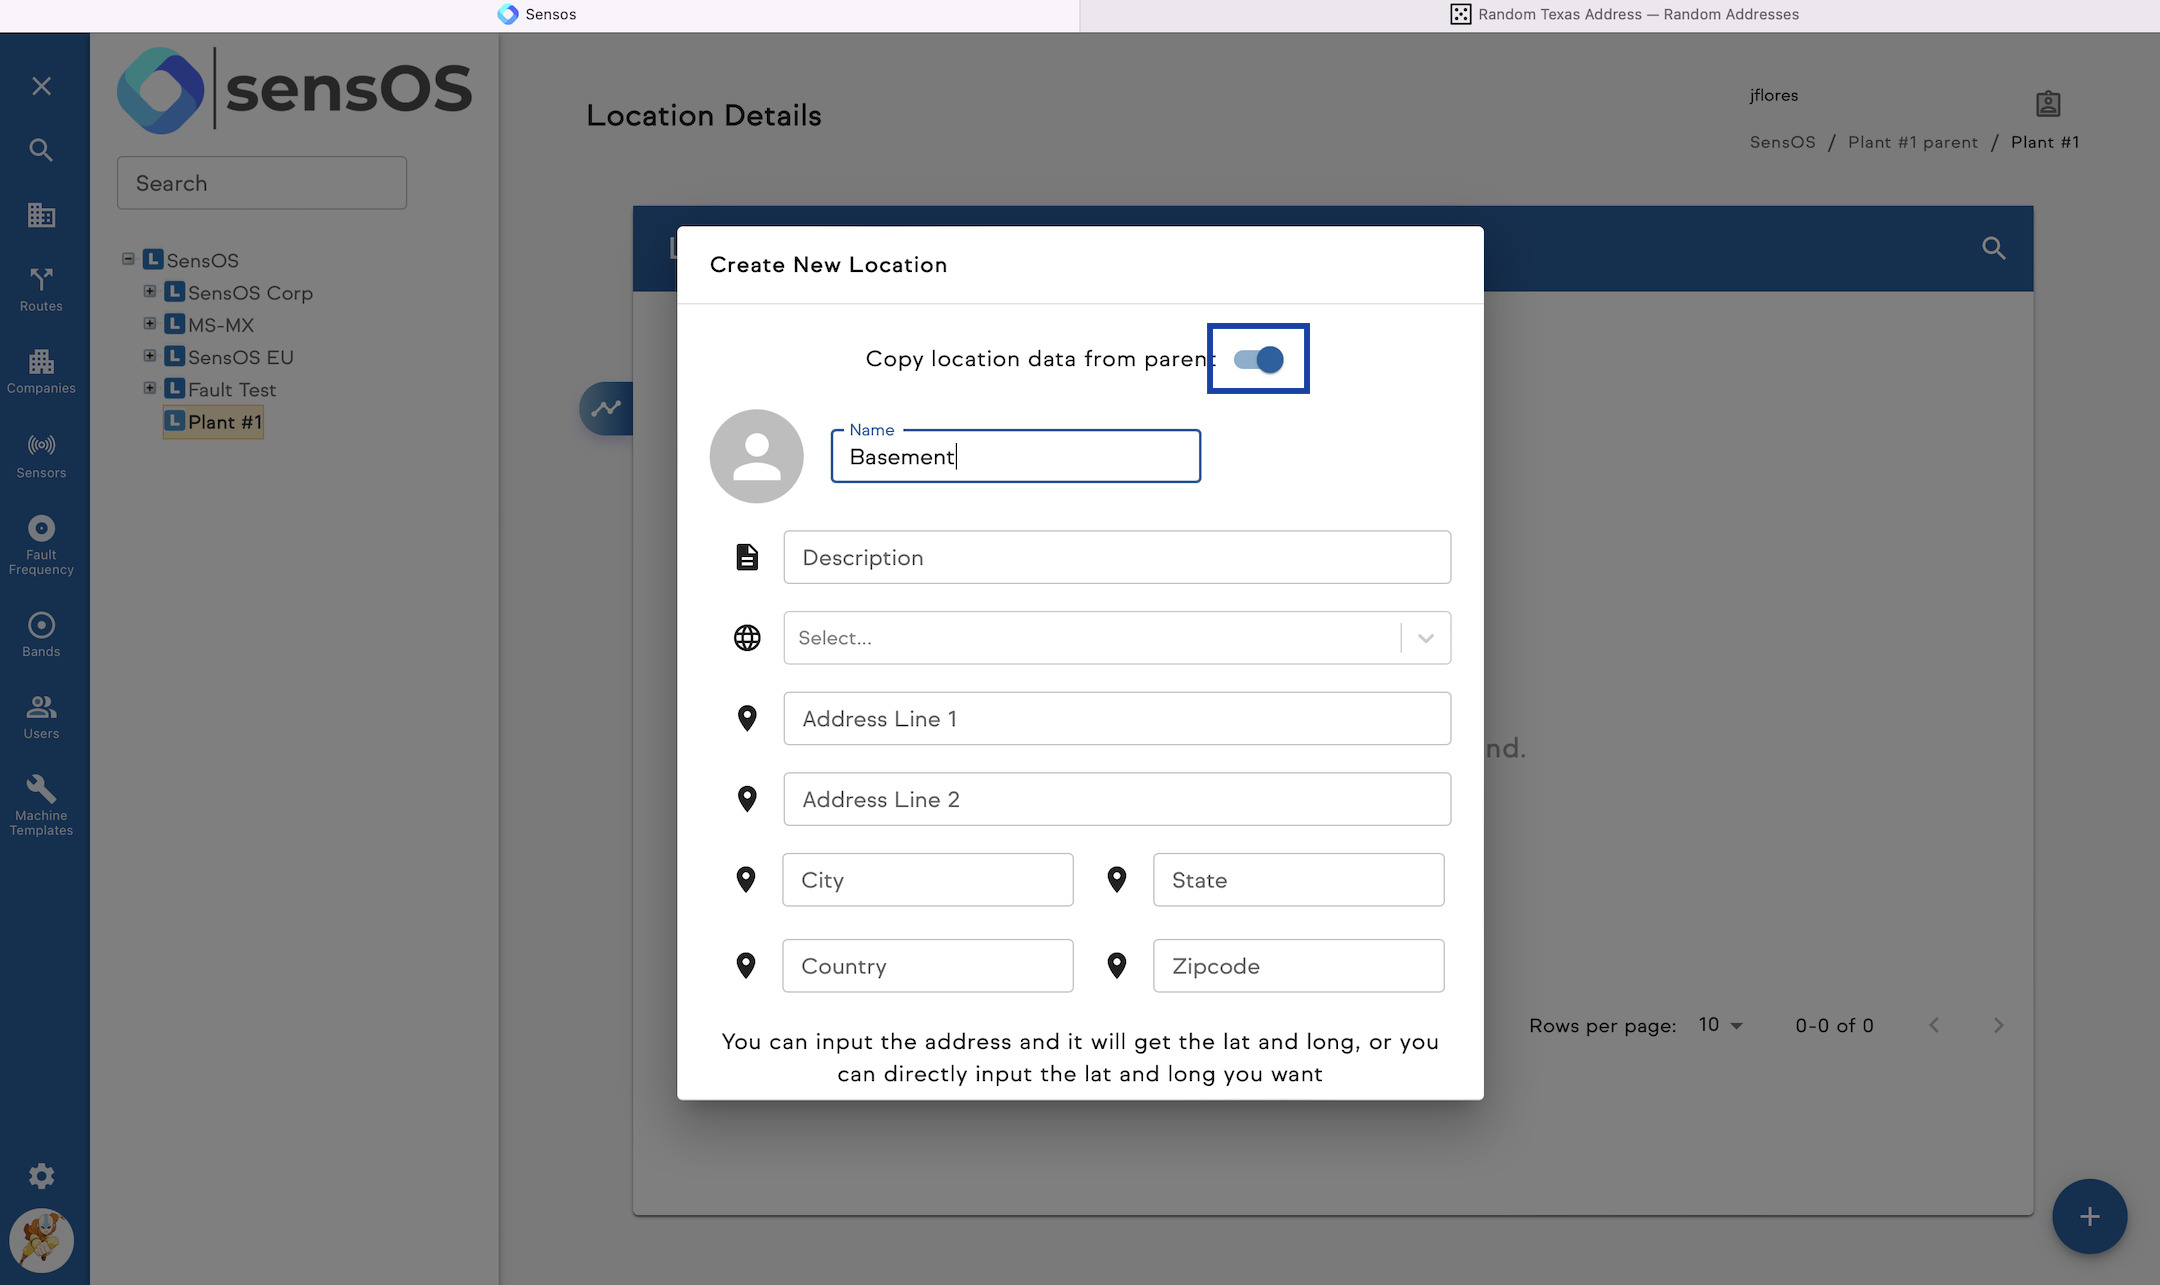
- Extra Locations can be added to any location, right-click and fill in Name and Address, the Option to copy Info from Parent Location is always available to expedite the process.


Adding Machines for Route Data Collection
- At any Location, the option to "Add Machine" is available along with "Add Location", right-click on the Location that will contain Machine and left-click to Add.
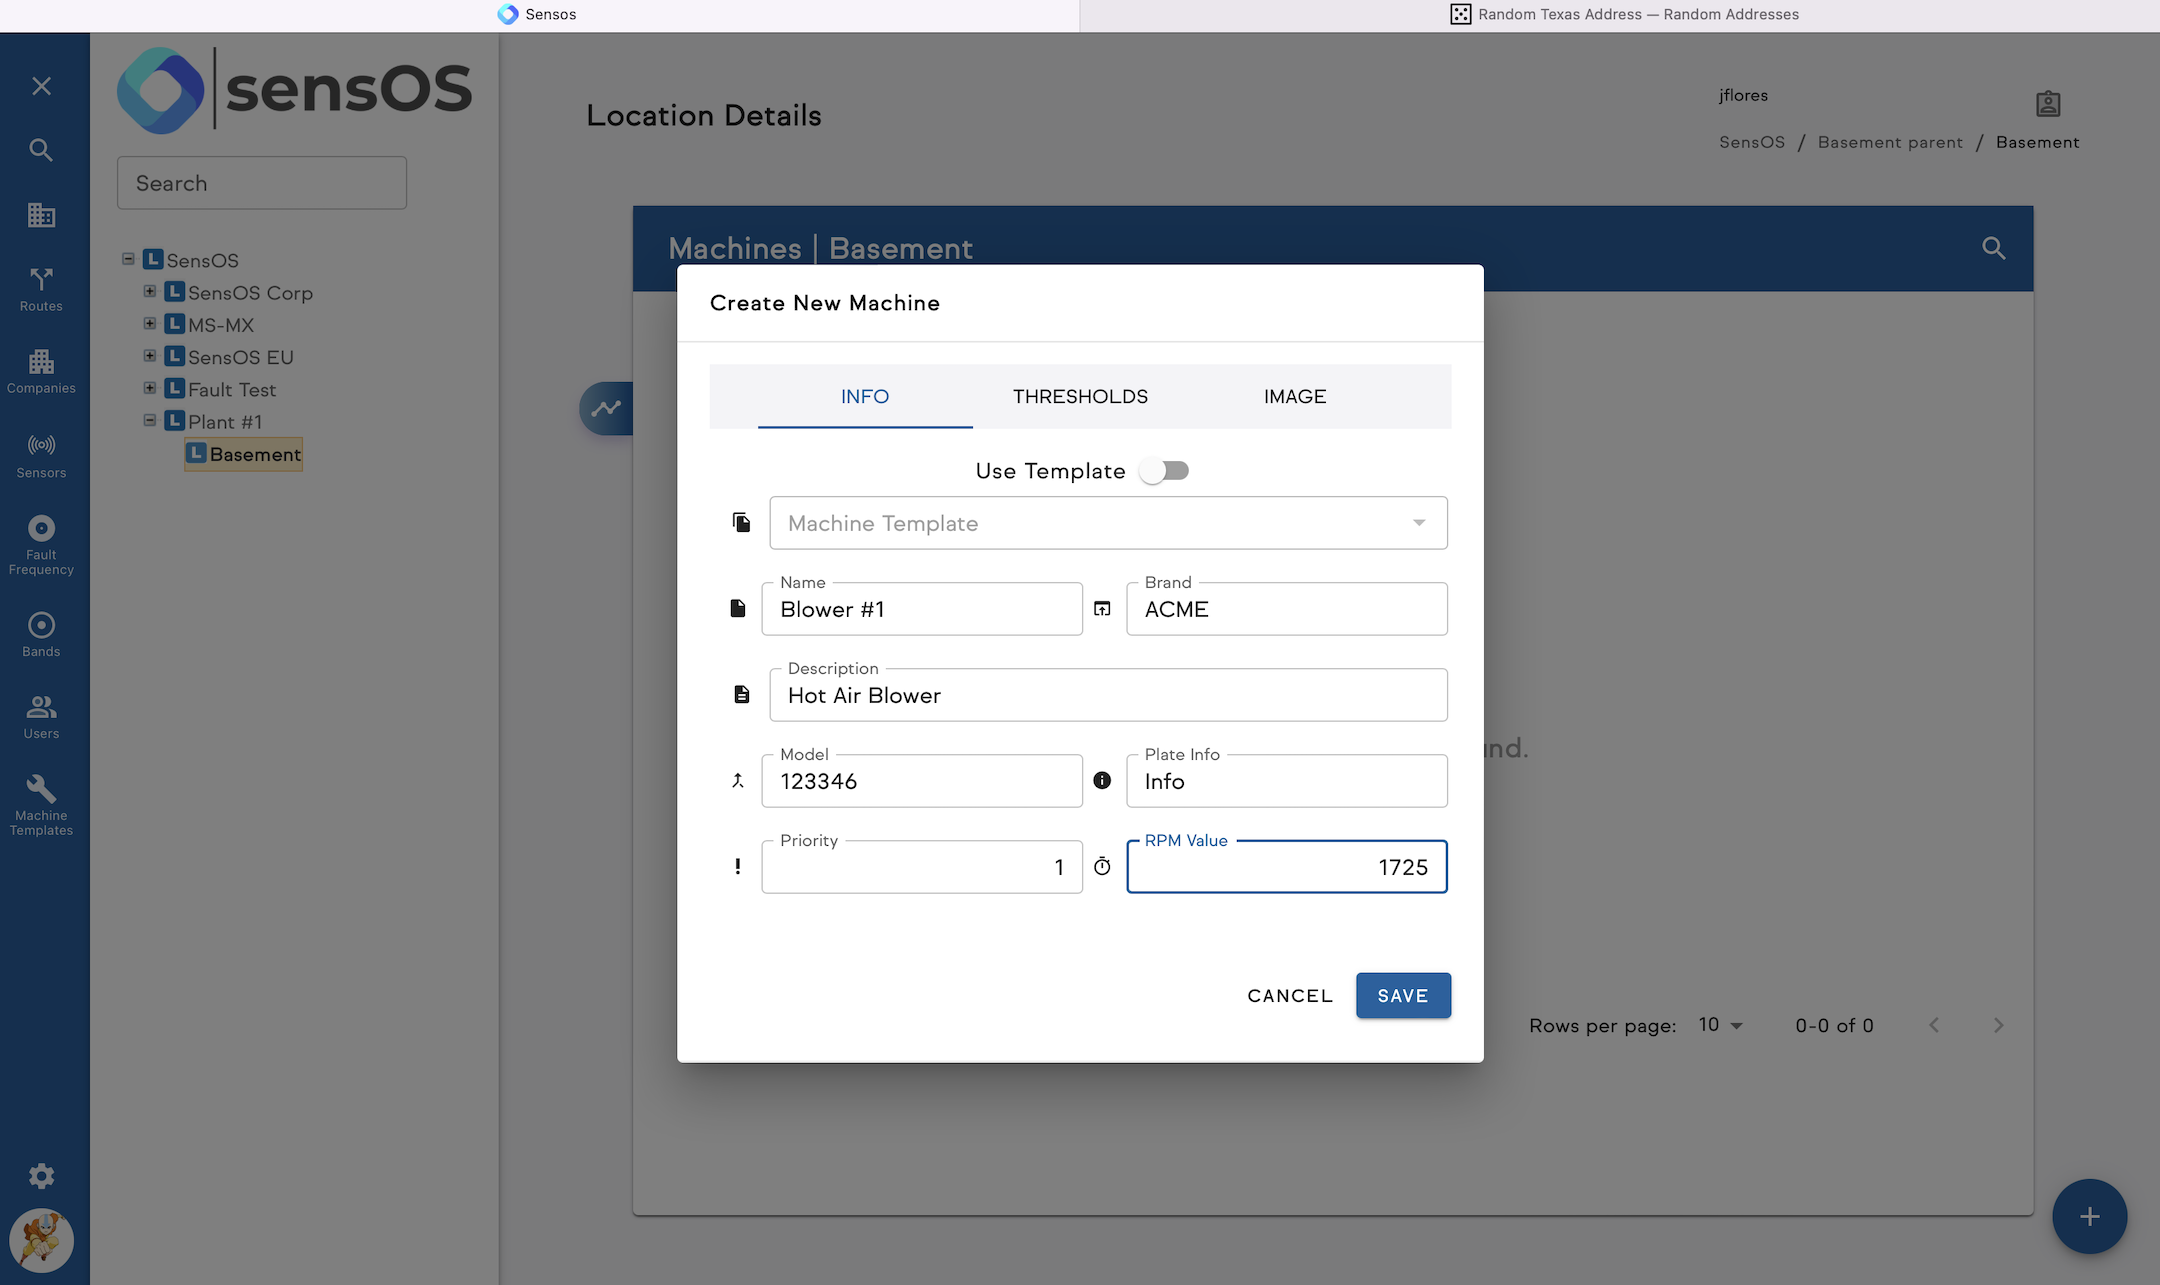
- After "Add Machine" is selected, a new pop-up will show, the "INFO" Tab contains Machine Information, Name is Mandatory. Description, Model, Plate Info, Priority and RPM Value are Optional
- The "Thresholds" Tab contains thresholds for Vibration, Ultrasound level and Temperature, these values are optional and can be used as Components and/or Points thresholds by selecting "Inherit Thresholds from Machine" to be explained in next section) or be changed for individual components later.
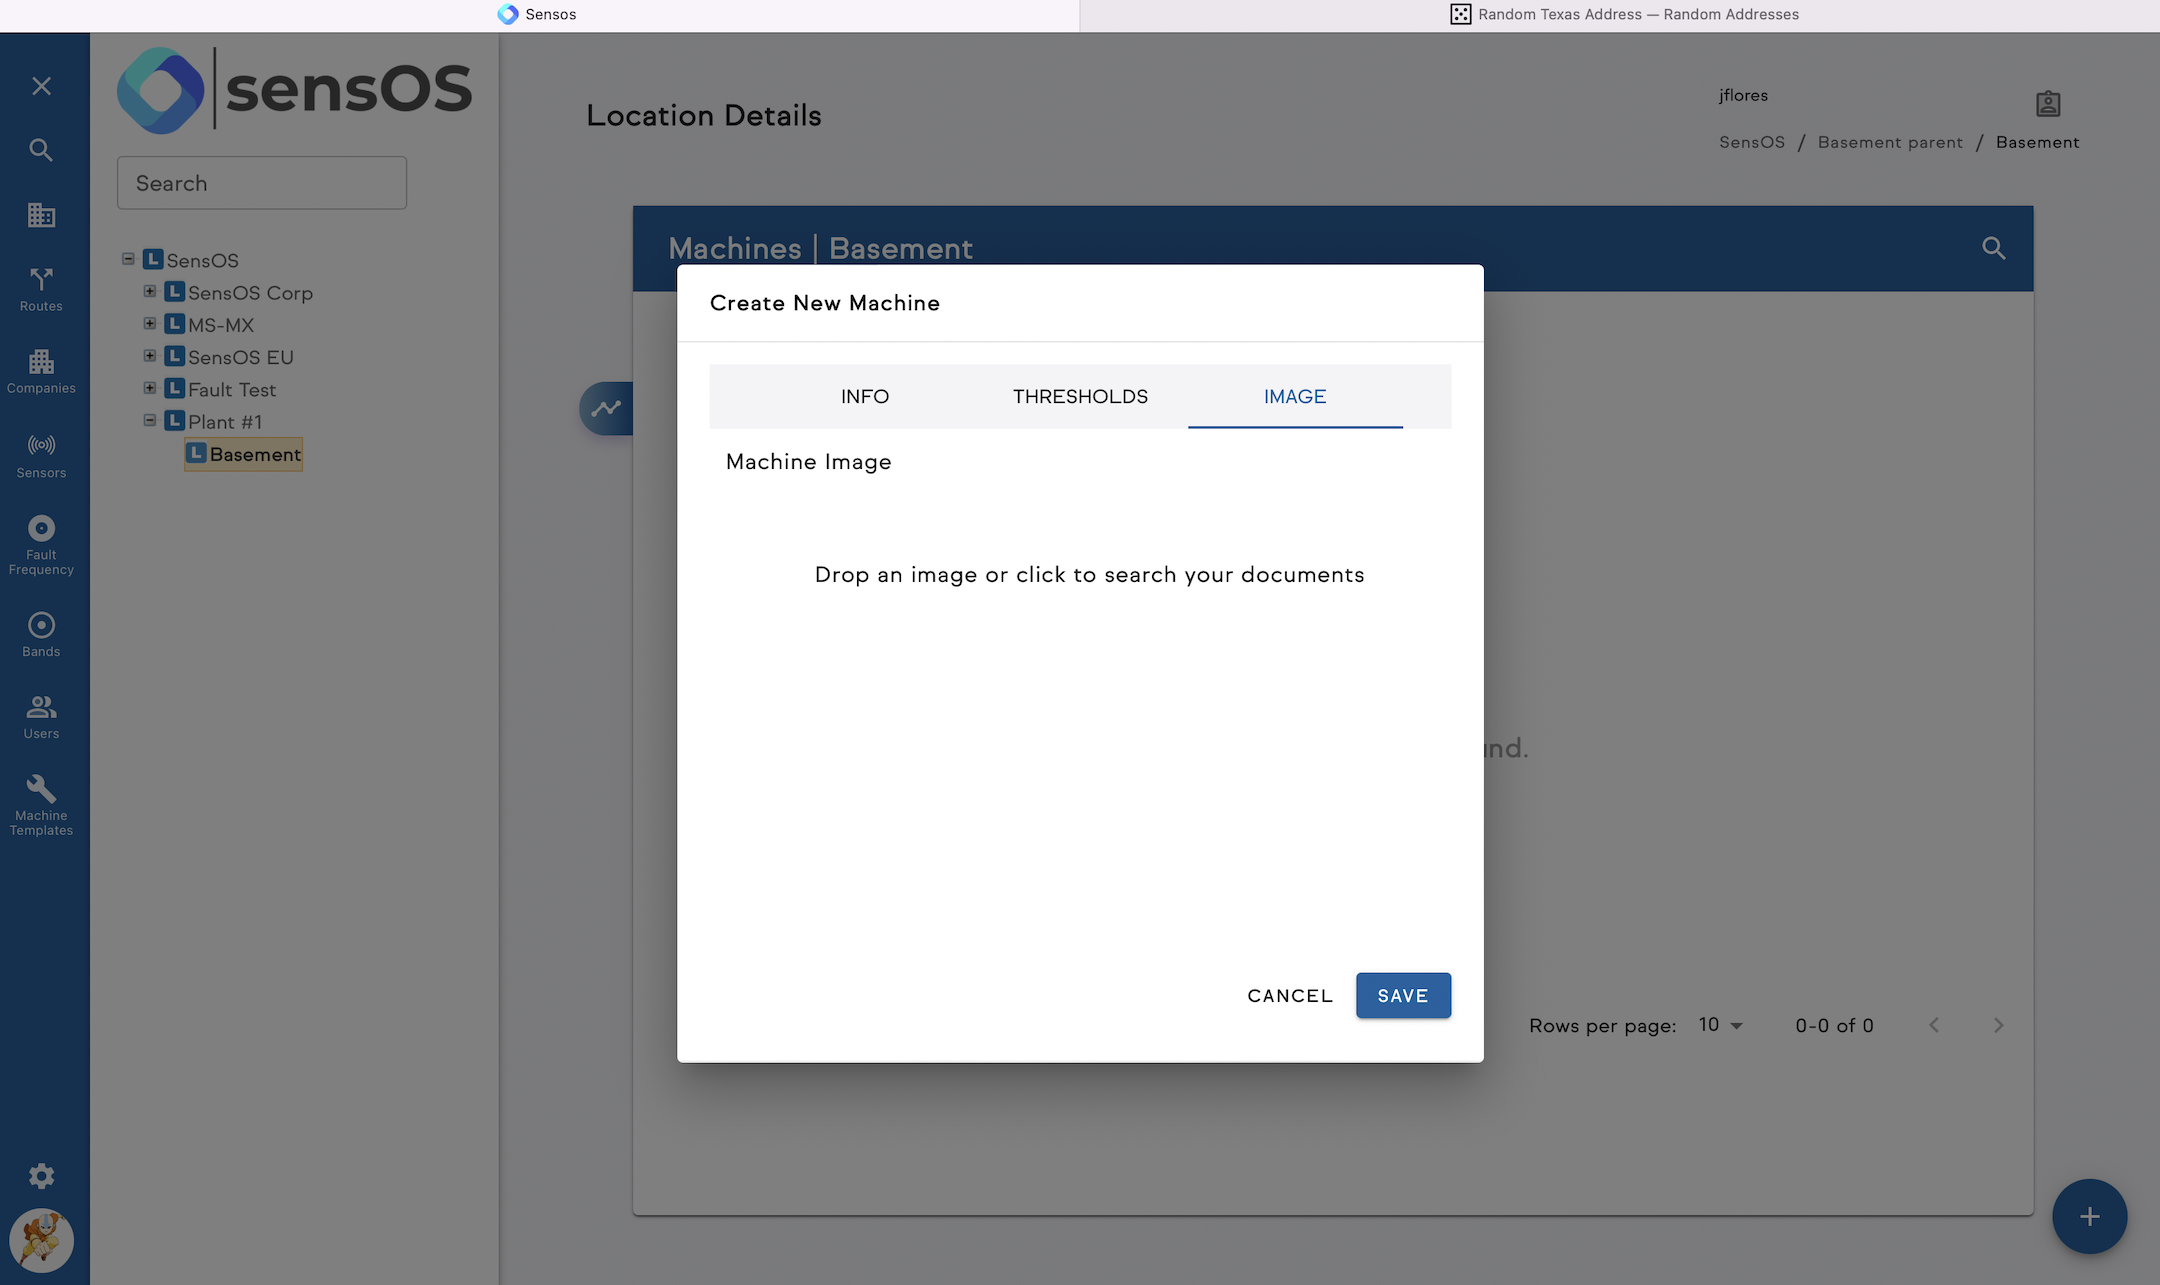
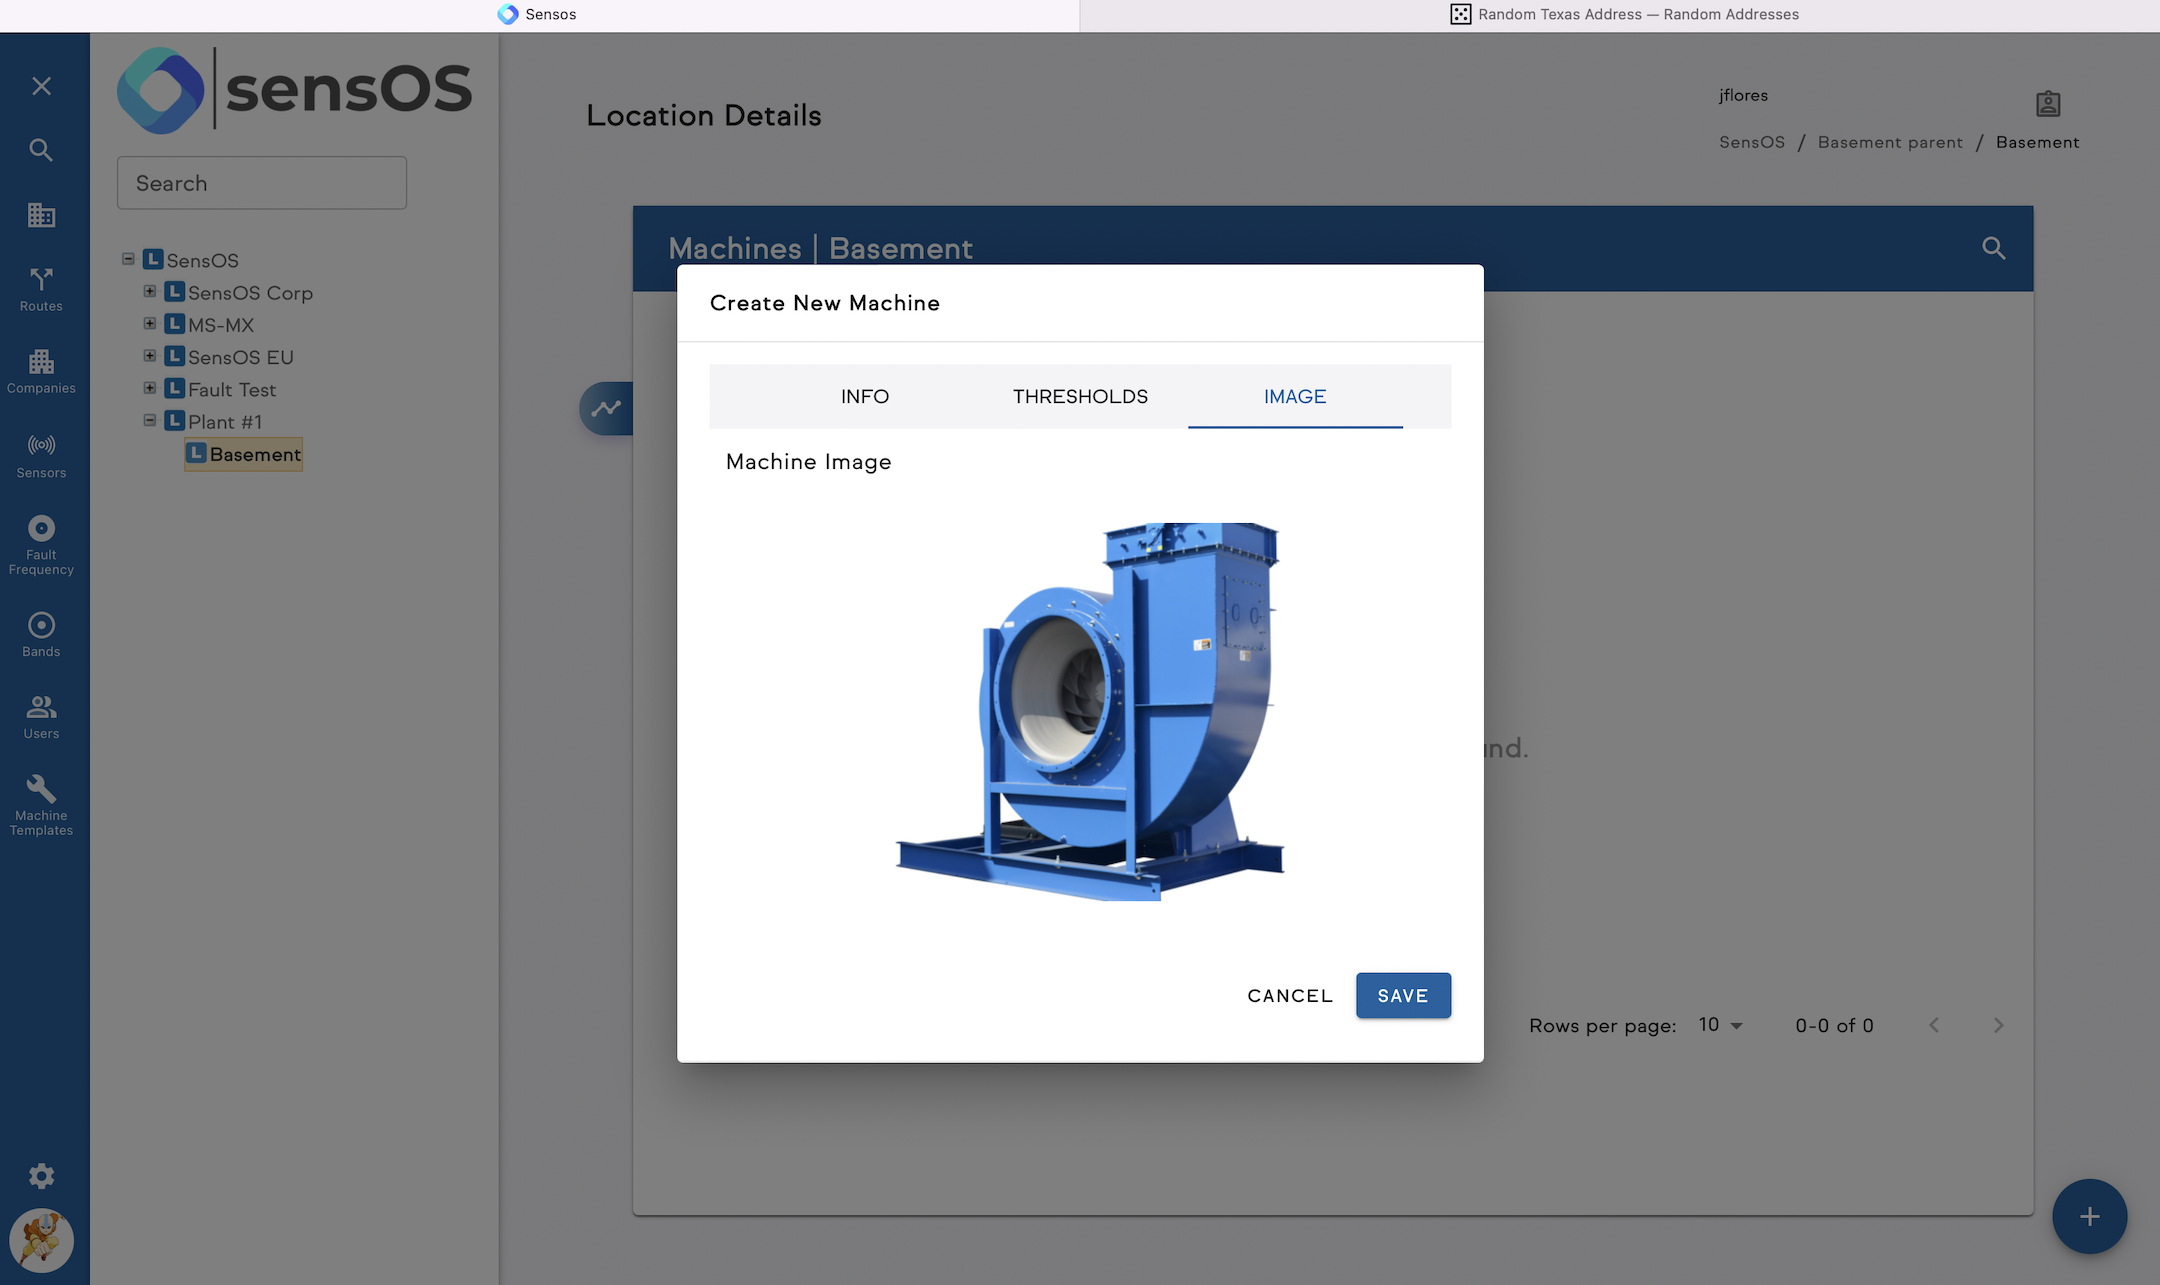
- The "Image" Tab allows to upload Images for each machine, they are shown in reports and in MS-2234 and MS-2233 Route Data COllection Apps. Drop or click to select Image. Press Save when done.

Adding Components for Route Data Collection
- Once a Machine has been created, the right-click menu allows to create either Points for said Machine or Components within a Machine which in turn will have points. Basic Machines, i.e. Fan Motor, only have Points. Complex Machines like machine trains will have separate components such as Motor, Gearbox and Pump. SensOS' Cloud System allows users to have flexibility when creating machines.
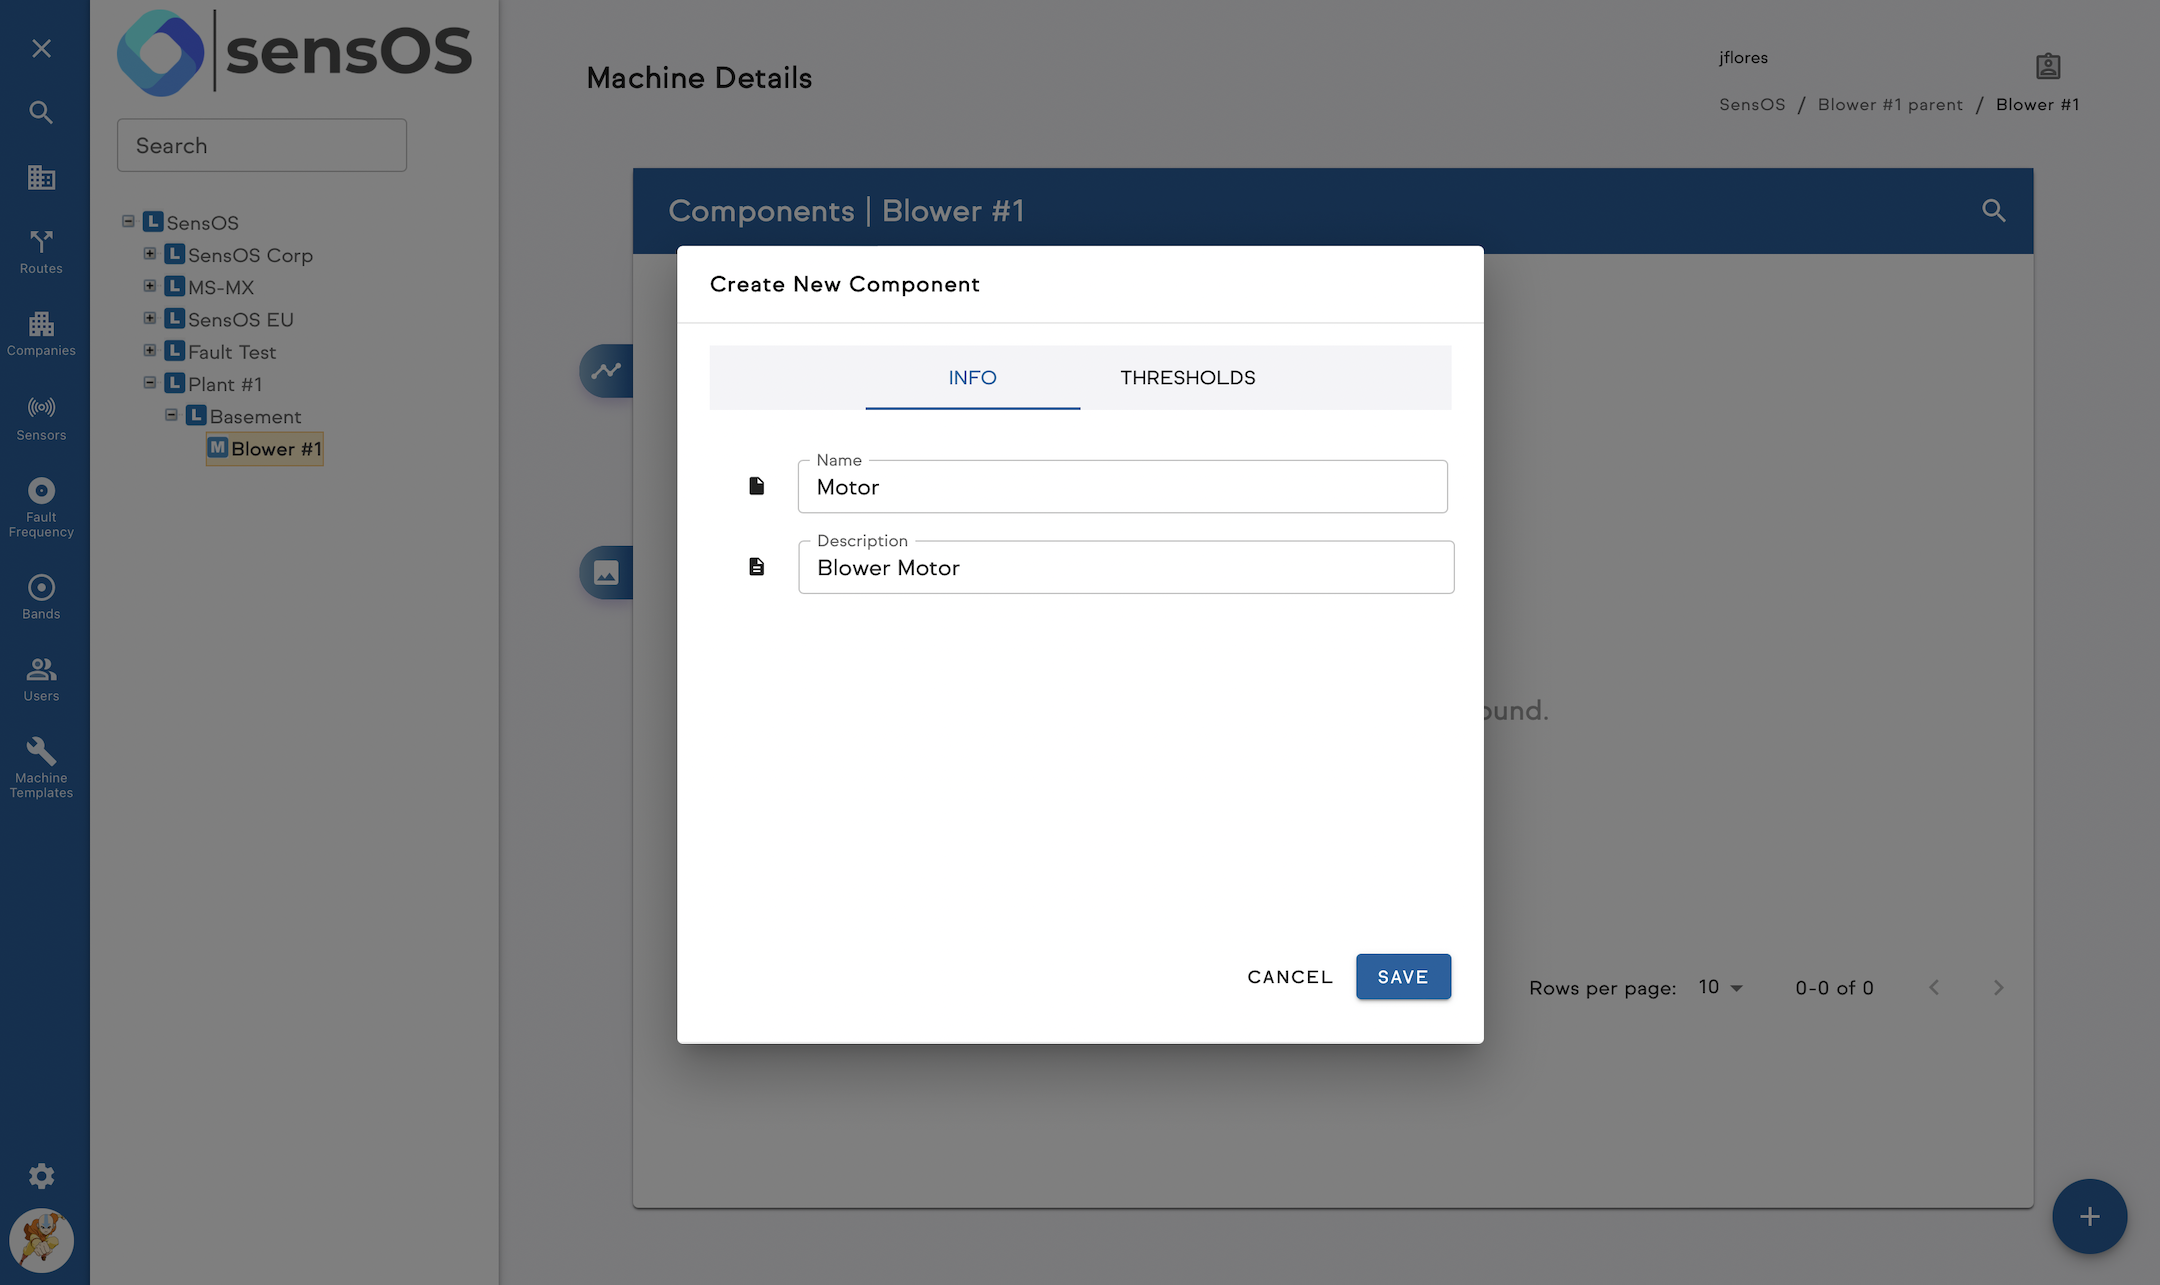
- After "Add Component" is selected, a new pop-up will show, the "INFO" Tab contains Component Information, Name is Mandatory. Description is Optional
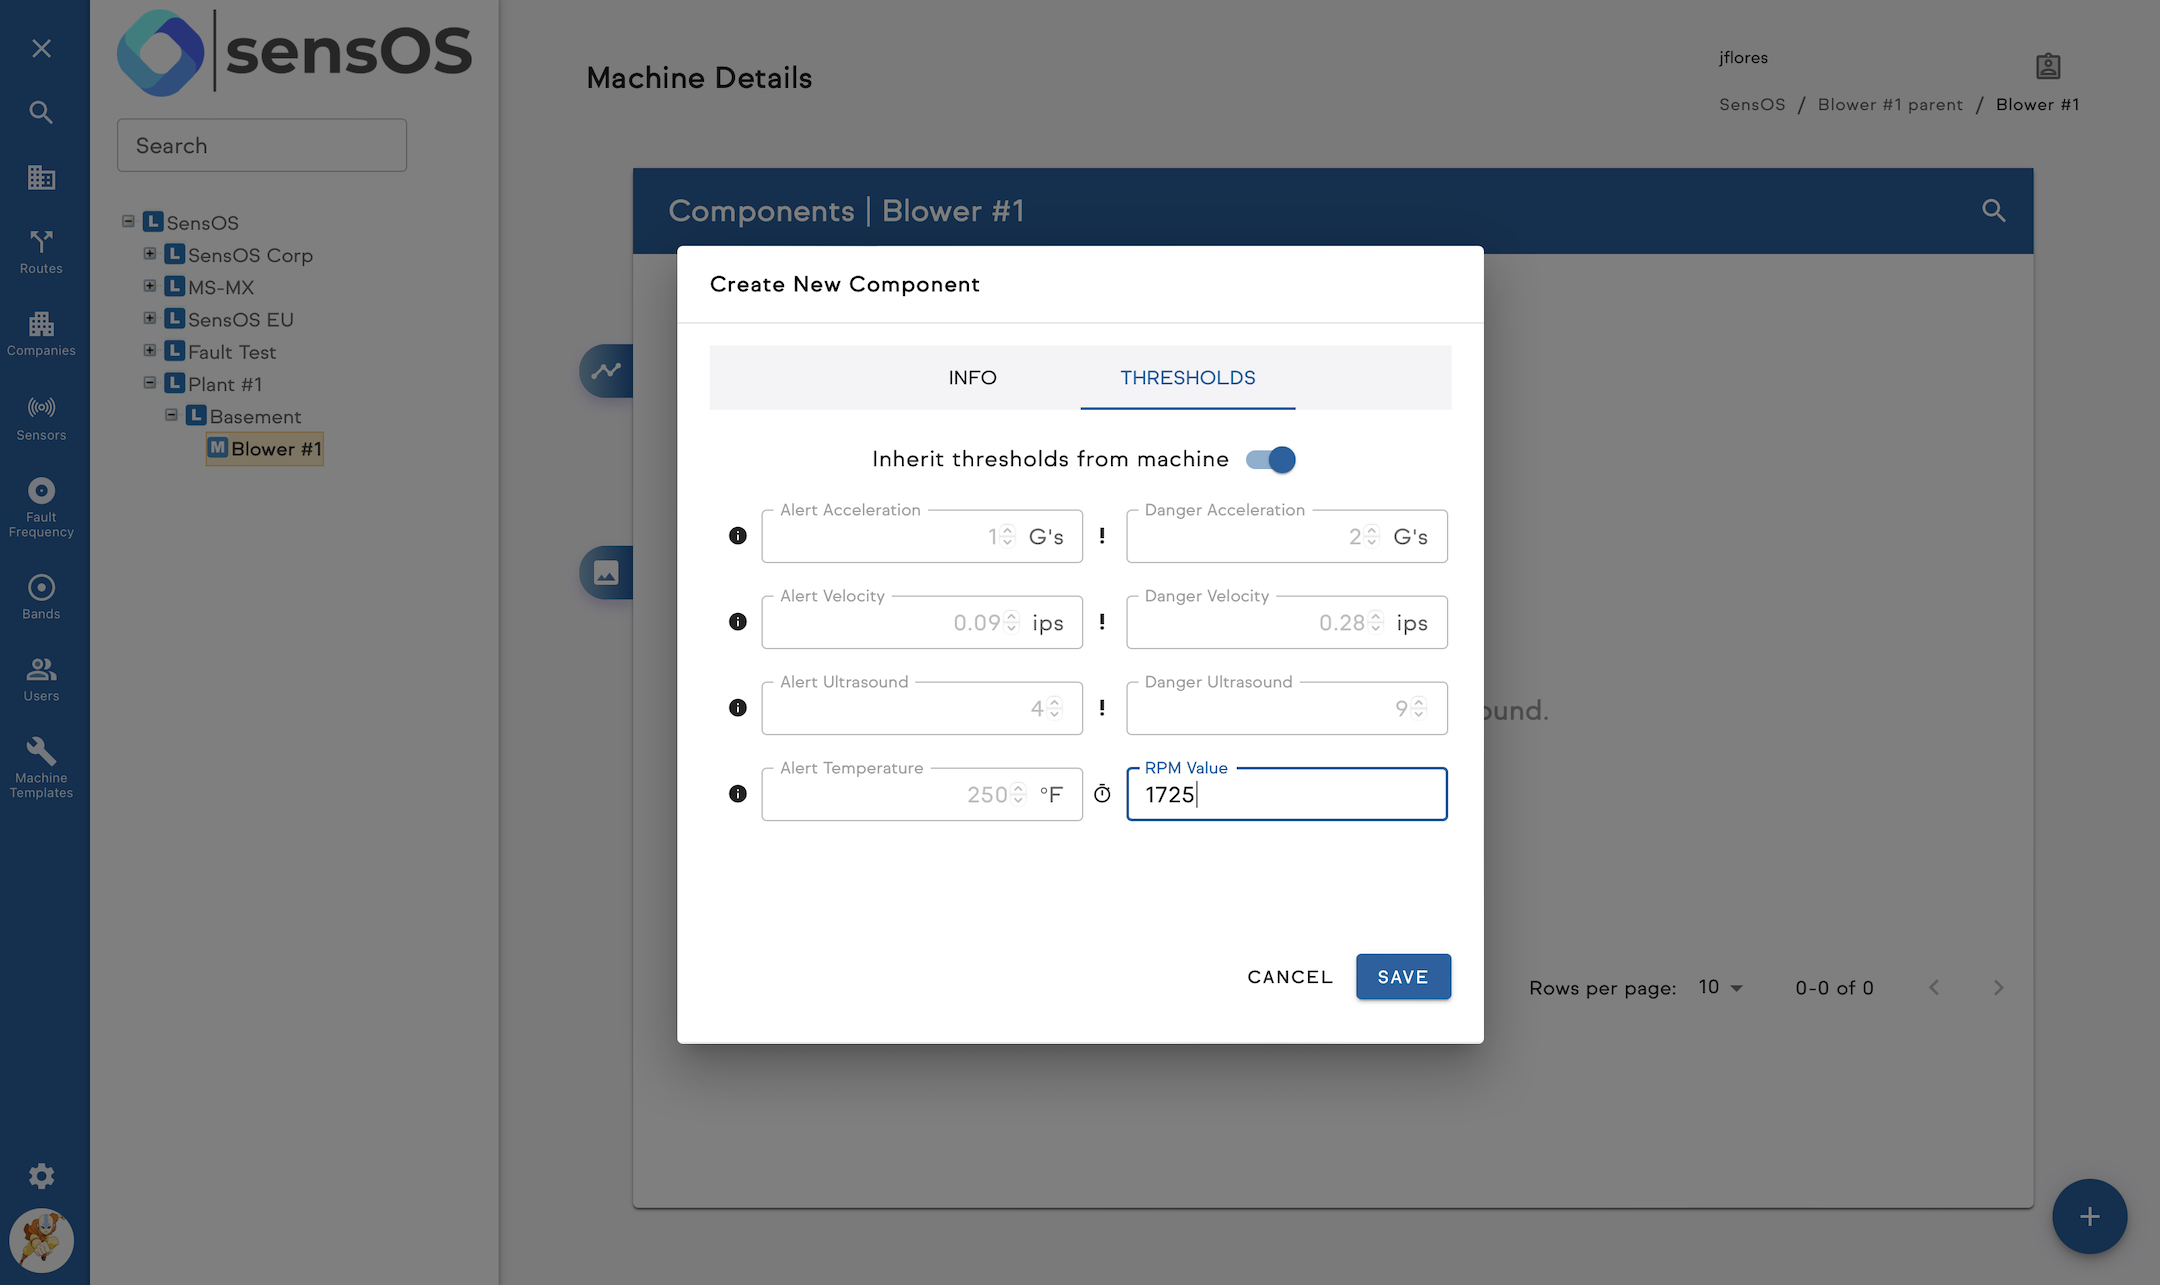
- The "Thresholds" Tab contains thresholds for Vibration, Ultrasound level and Temperature, these values are optional, by Toggling On the "Inherit Thresholds from Machine" Switch these values are copied from parent Machine, or user can add new values in this Tab.

Adding Points for Route Data Collection
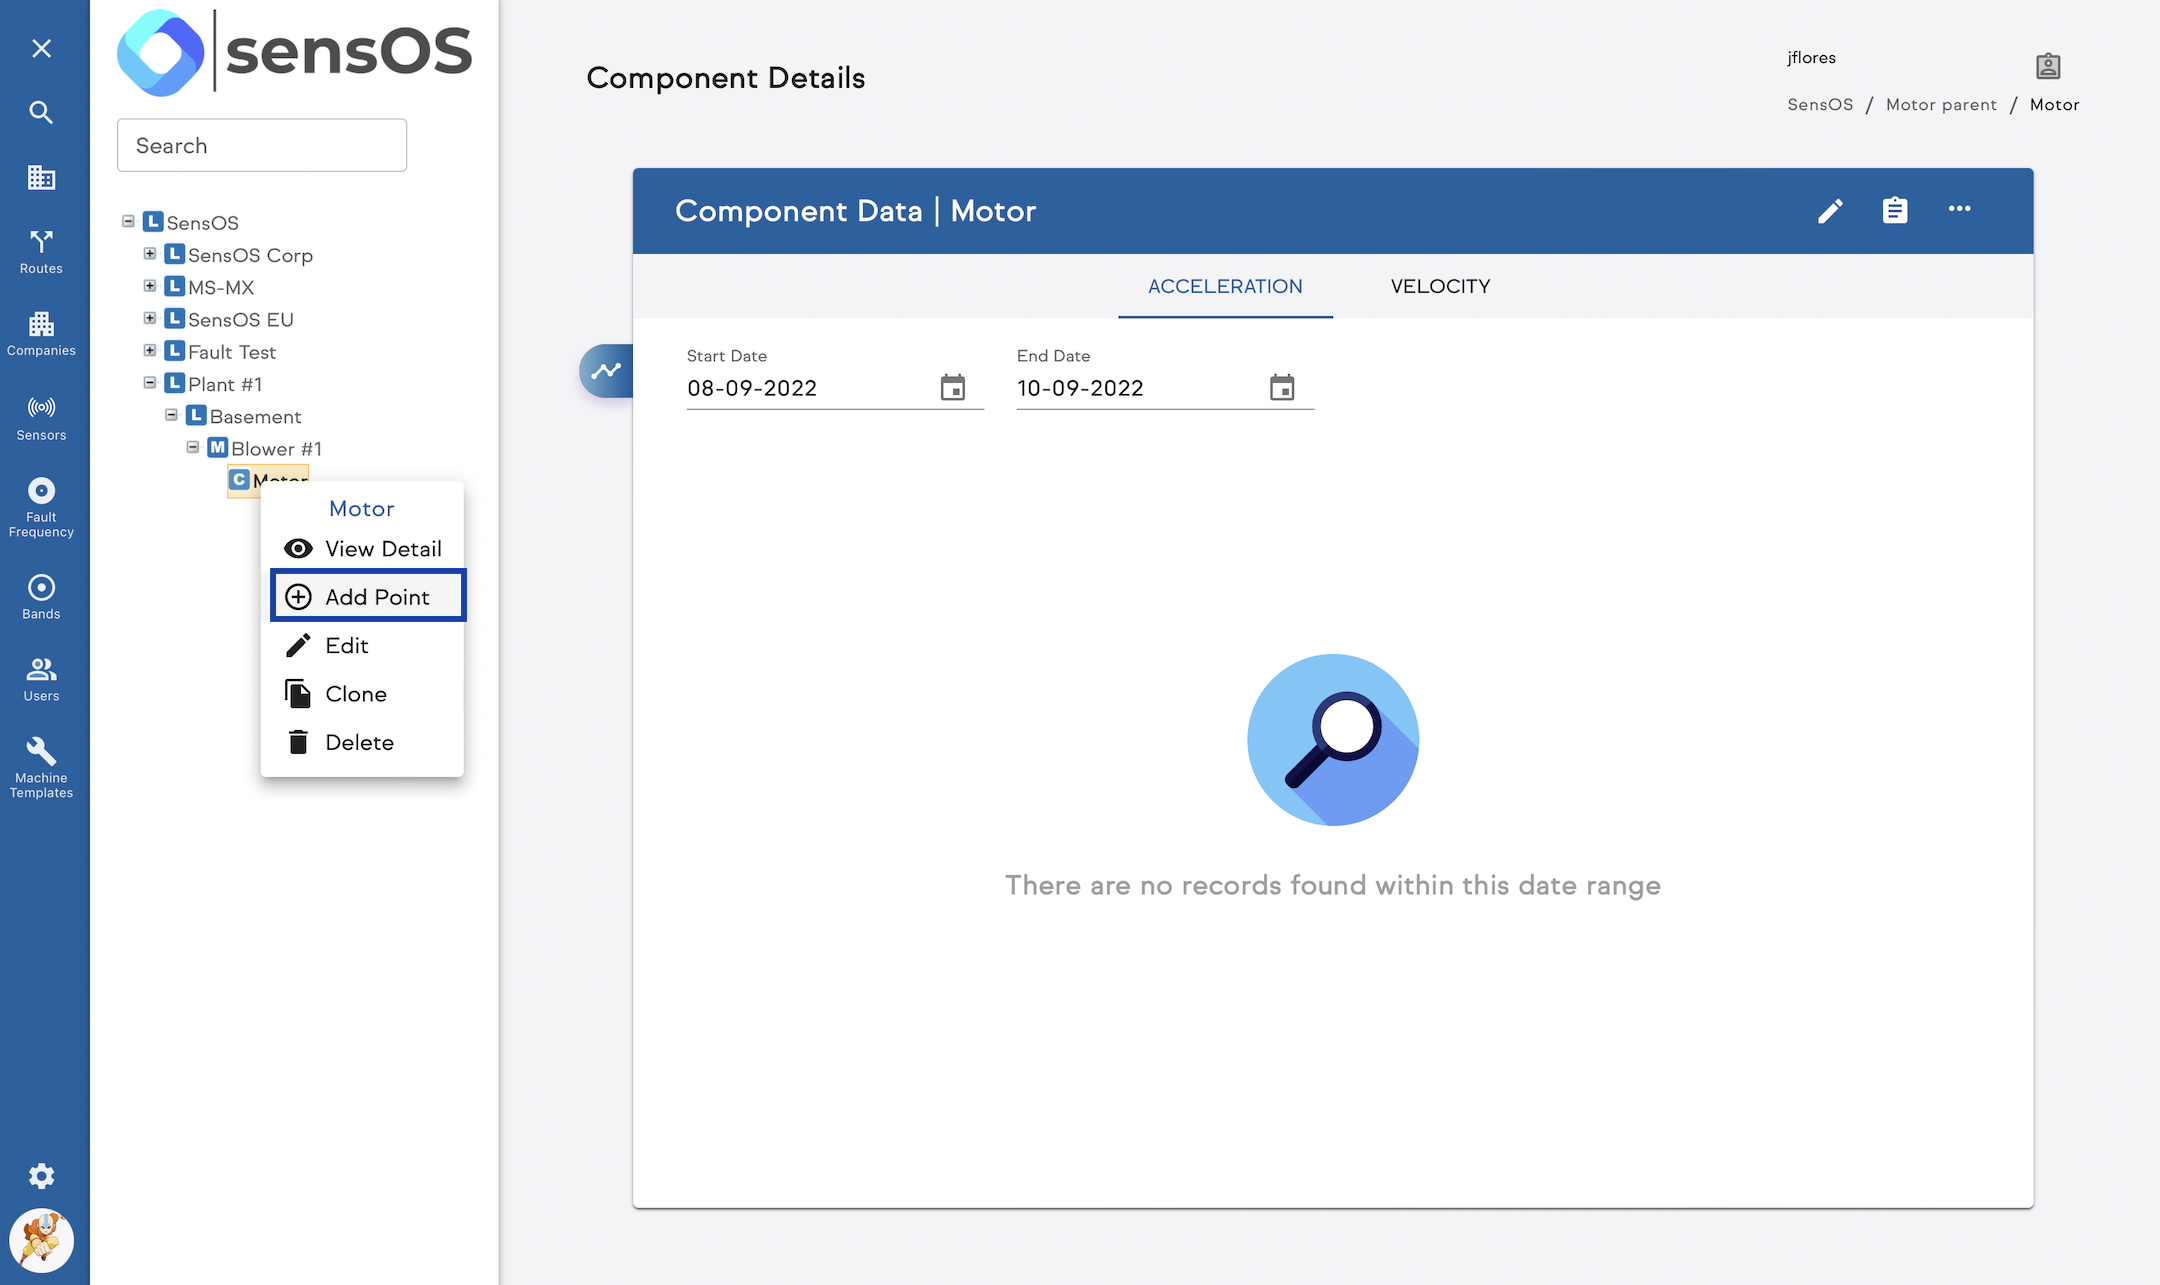
- Right-click on a Machine or Component and the "Add Point" buttom is available. Points can only be added to Machines or components.
- After "Add Point" is selected, a new pop-up will show, the "INFO" Tab contains Point Information, such as Point Name (Mandatory) and Number of Samples, default RPM Value, FMax, Instructions and Axis. All these values are optional.
- Number of Samples: The number of Samples for Vibration Data Collection will affect the FFT resolution of readings, since SensOS' System works with different sensor OEMs the lowest and highest Number of Samples available are dependant on them. User selects a number and the system will select the closest Number of Samples at the time of collection. Refer to your SensOS representative for more info on appropiate sensors for your application.
- RPM Value: this will be the default RPM value for the Point, in MS-2234 or MS-2233 Apps users get the option to change measurement RPM, Measurement RPM can also be changed in the Cloud App.
- FMax: FMax value will dictate the Sampling Rate, just like in Number of Samples, sensor of choice characteristics will limit highest and lowest values. SensOS System will select the closest FMax to the value entered based on sensor data is collected with. Refer to your SensOS representative for more info on appropiate sensors for your application.
- Instructions: This message will appear in MS-2234 or MS-2233 Apps to let technician know specific instructions to follow at the time of collection.
- Axis Selection: if using triaxial vibration sensors, select the appropriate orientation to match X, Y and Z Axes in sensor to Horizontal, Vertical and Axial positions.
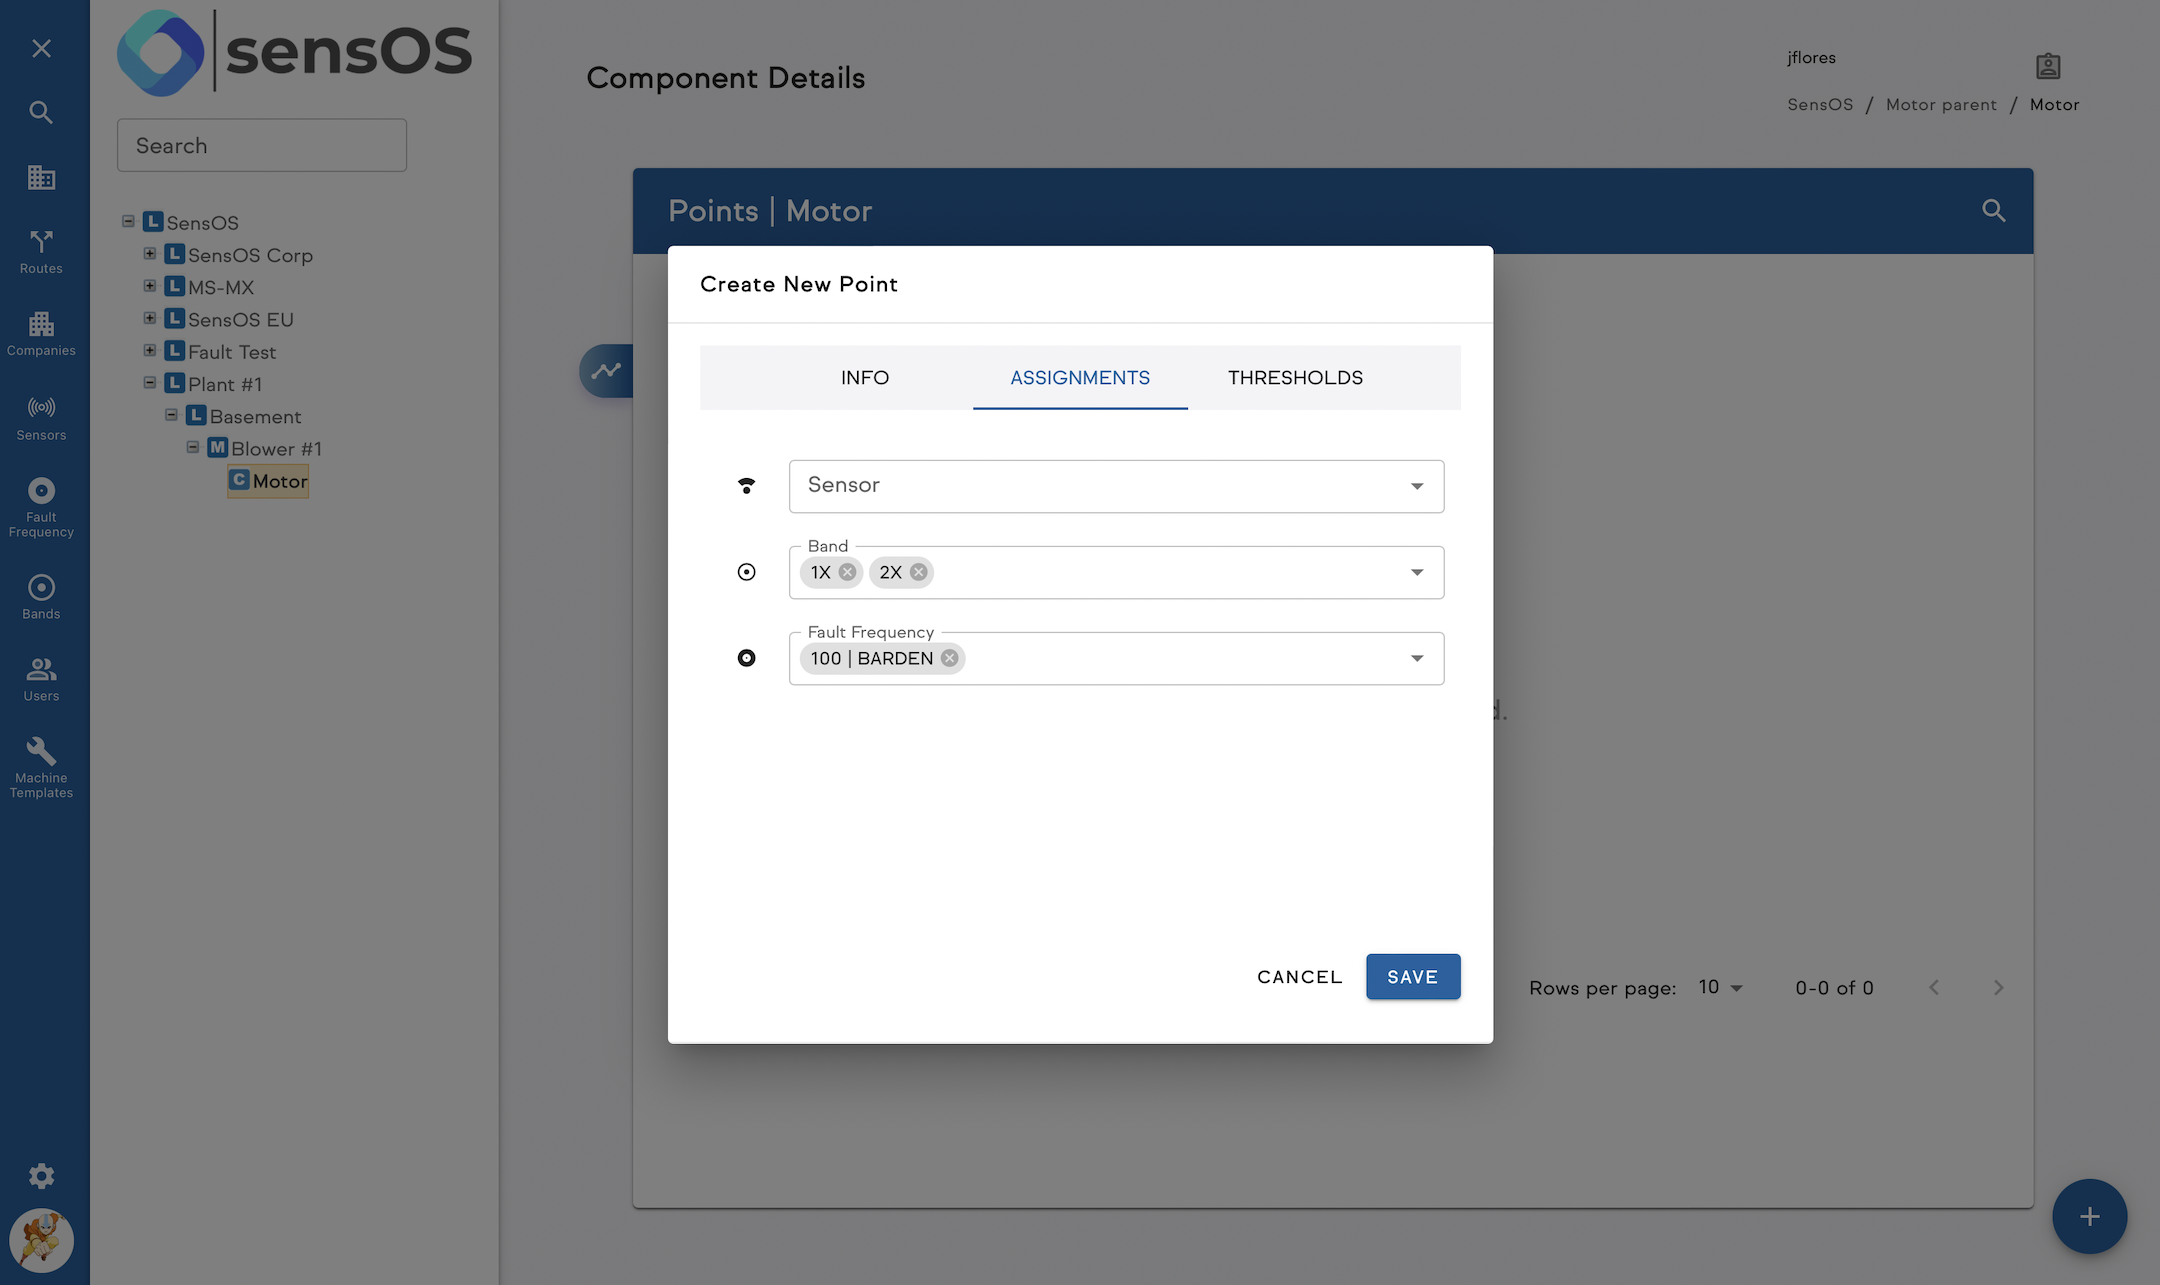
- The "ASSIGNMENTS" Tab allows user to select a "Sensor" (only needed if point is to be monitored with online sensor) Serial Number which will be available form dropdown list. "Band" will allow user to assign pre-defined bands of interest. Refer to documentation on how to create Bands. "Fault Frequency" allows user to add different Fault frequencies for point including bearing and user-defined interest frequencies. Refer to documentation on how to create Bearings/Fault Frequencies.
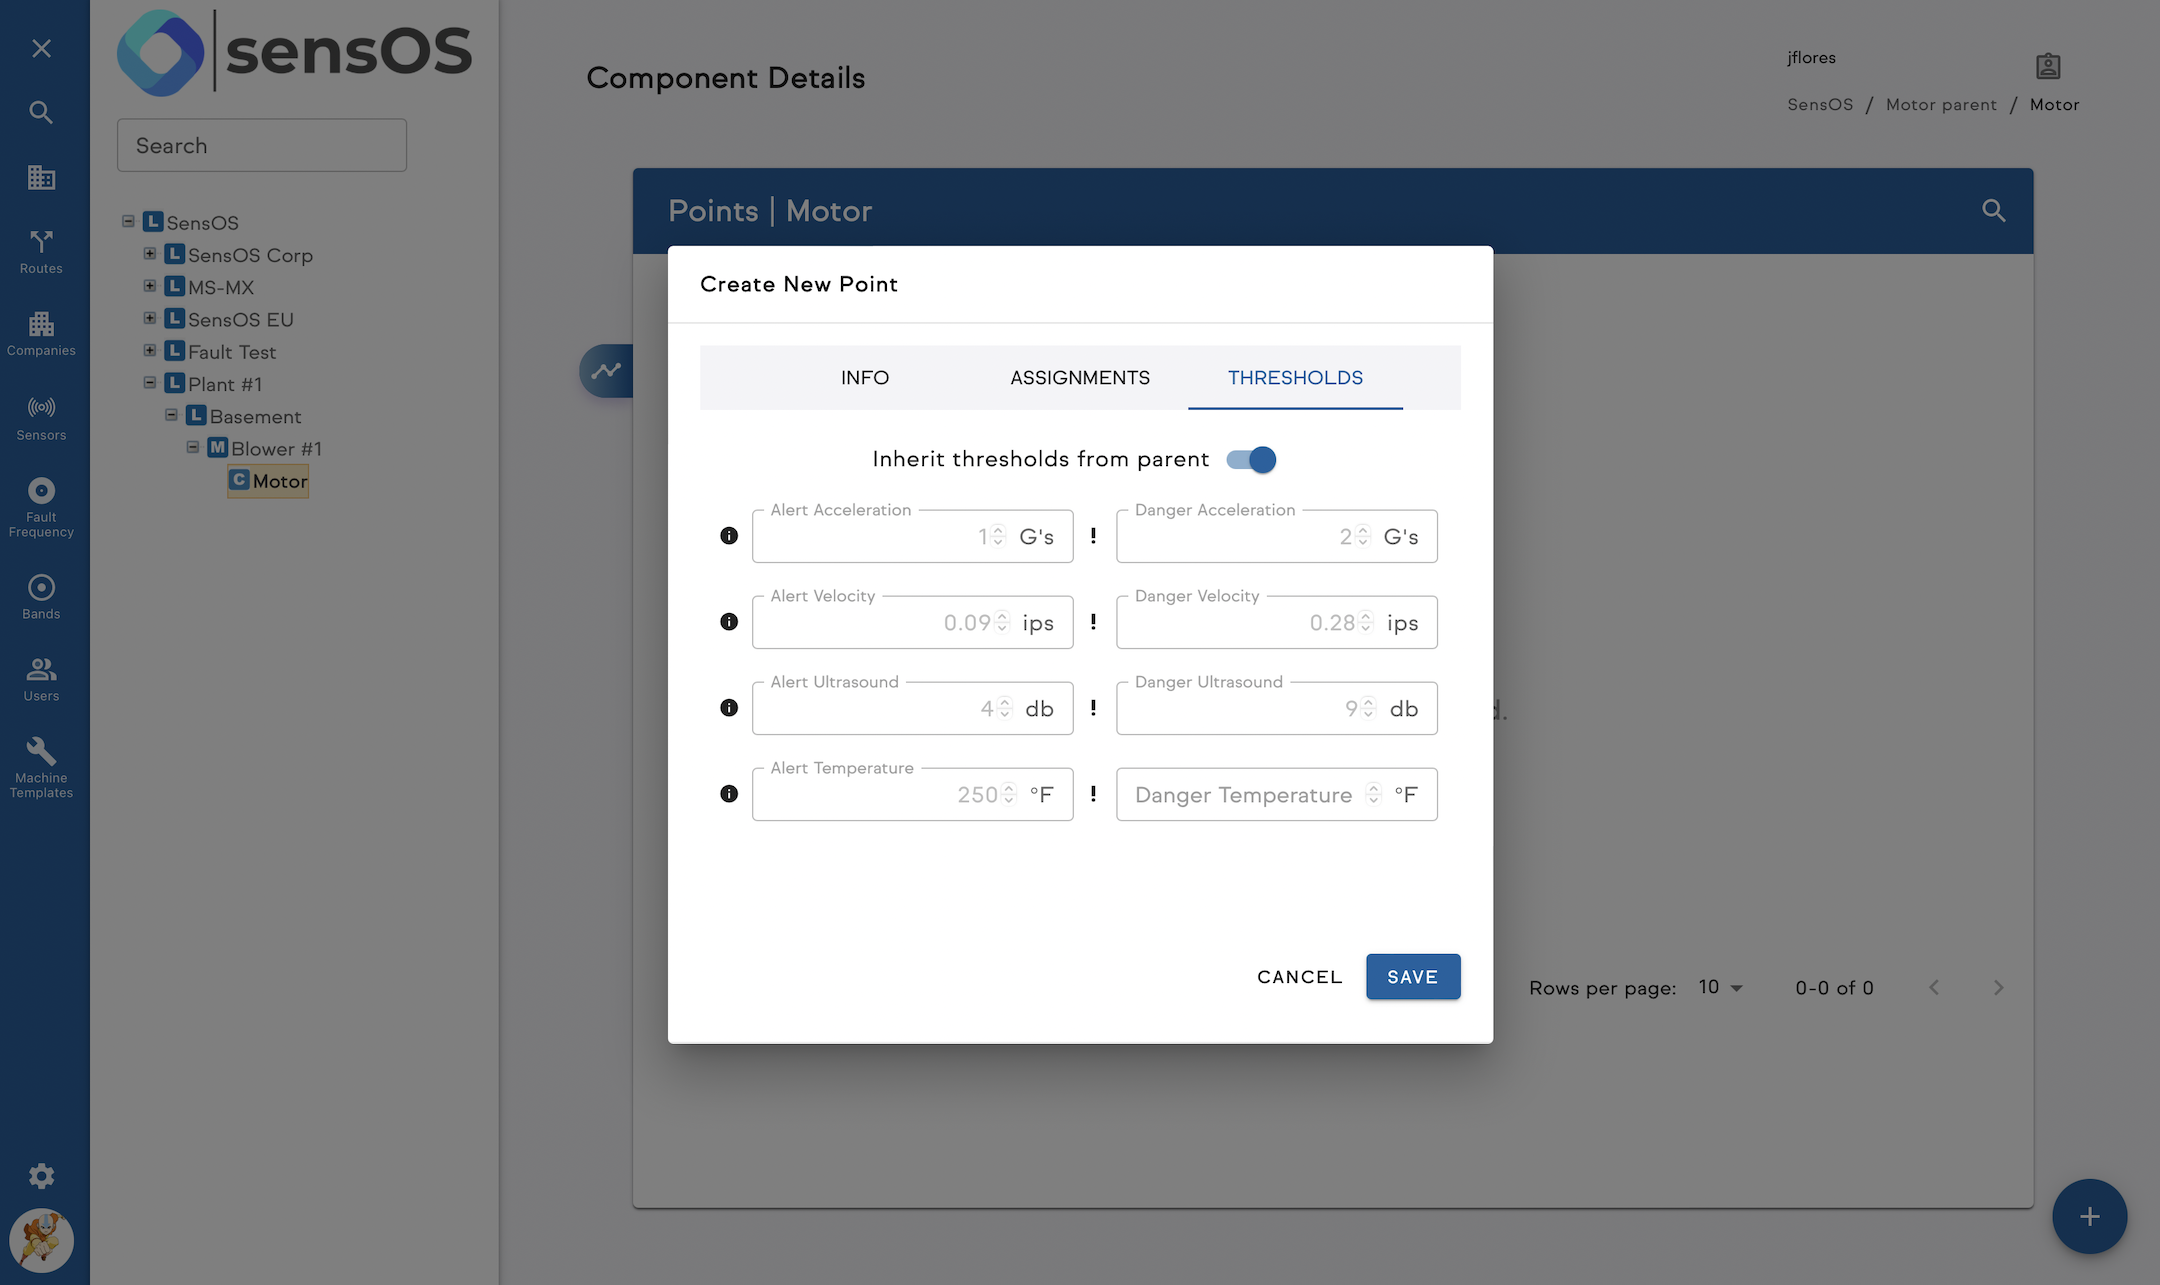
- The "THRESHOLDS" Tab contains thresholds for Vibration, Ultrasound level and Temperature, these values are optional, by Toggling On the "Inherit Thresholds from parent" Switch these values are copied from parent Machine/Component, or user can add new values in this Tab.

Cloning Assets
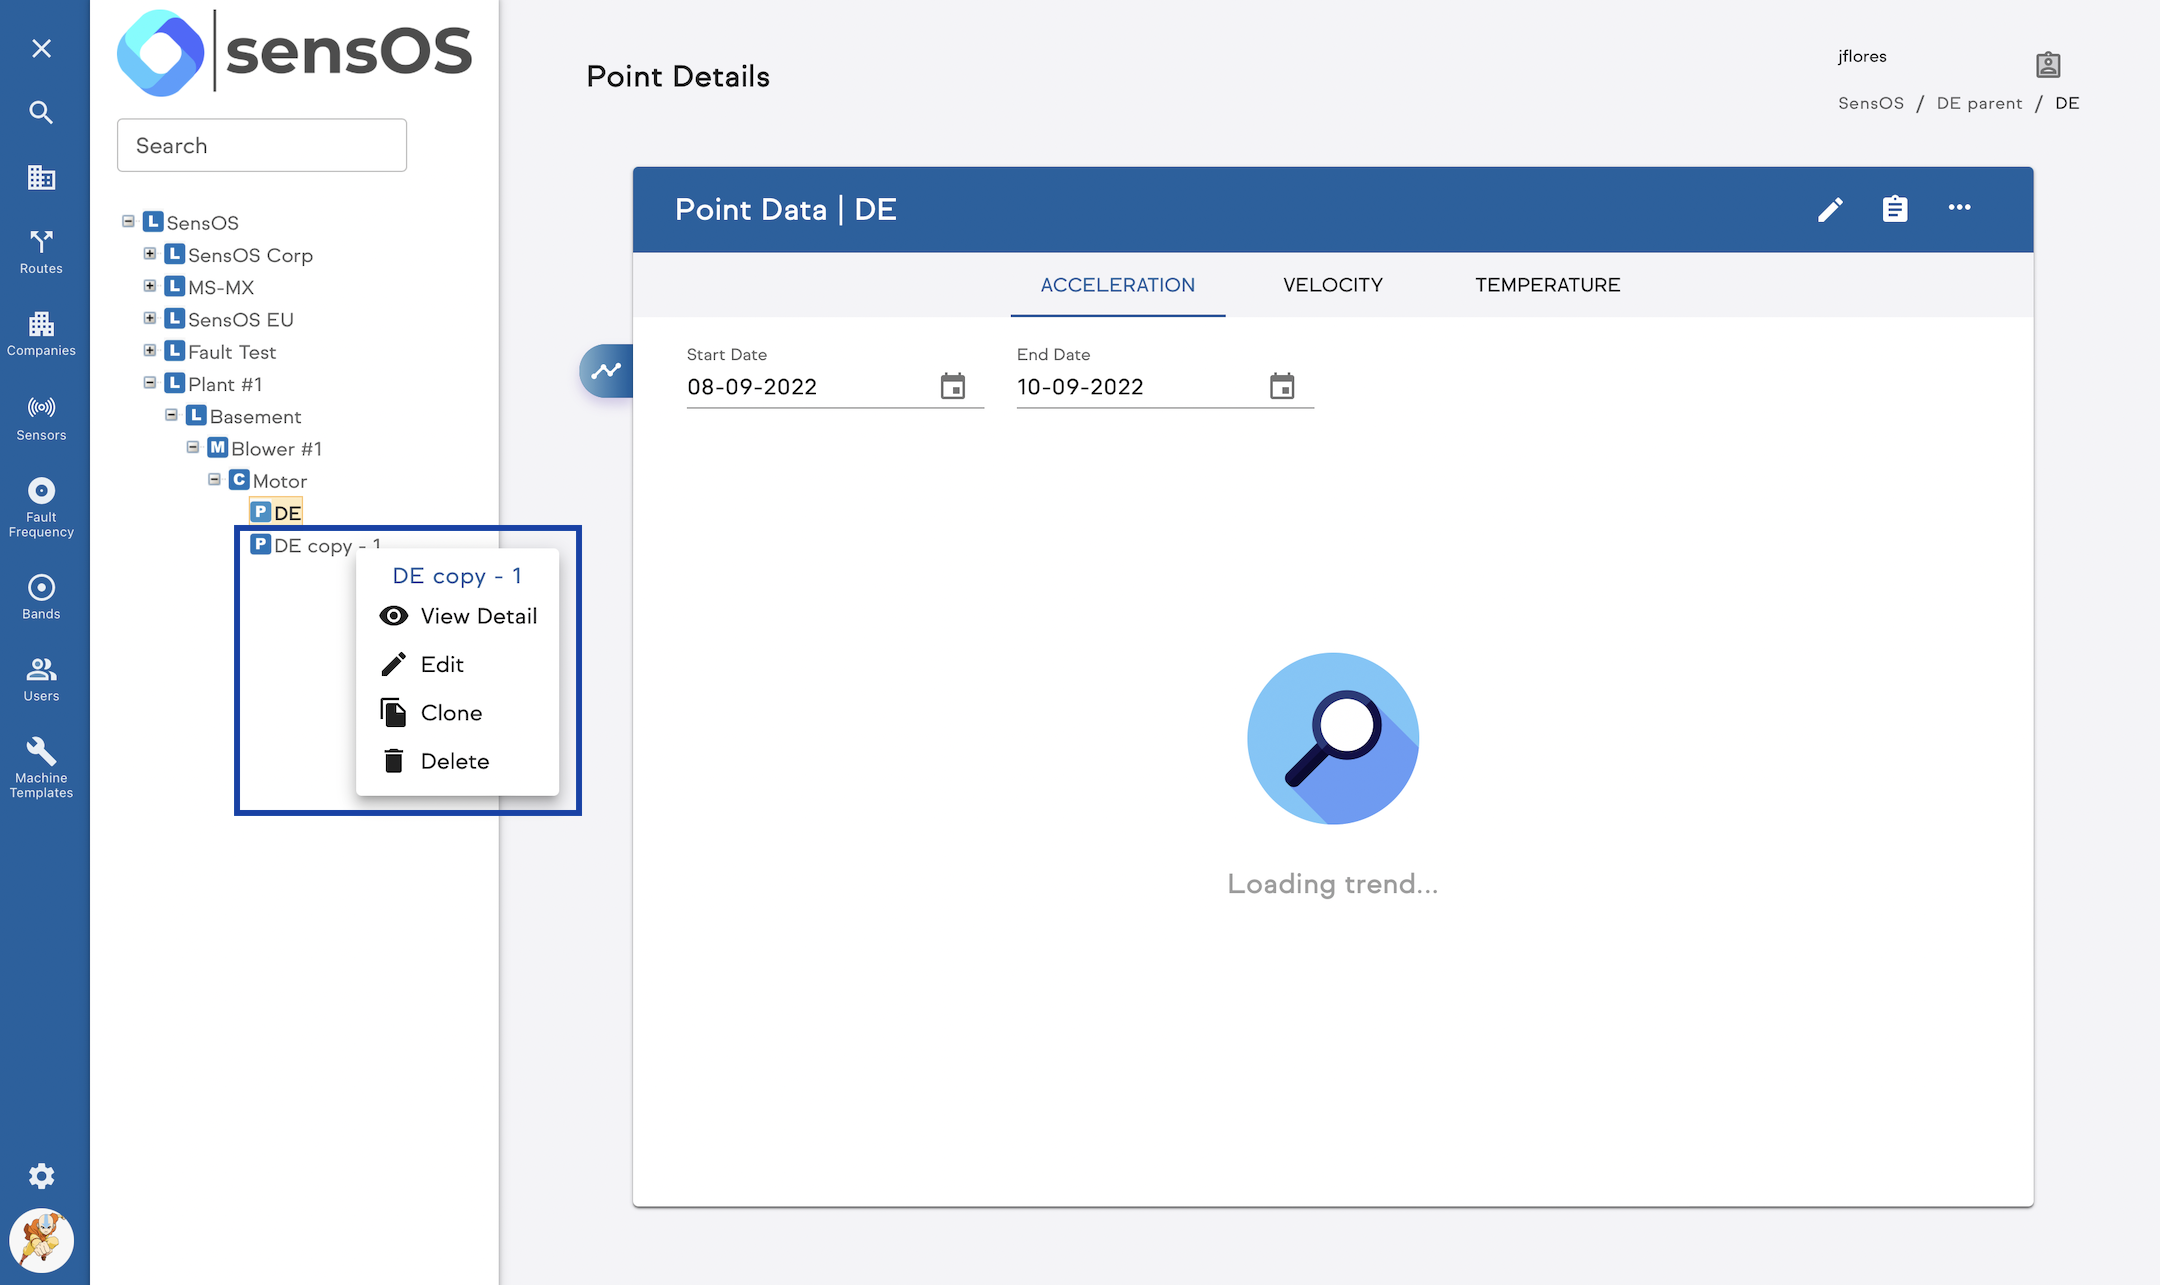
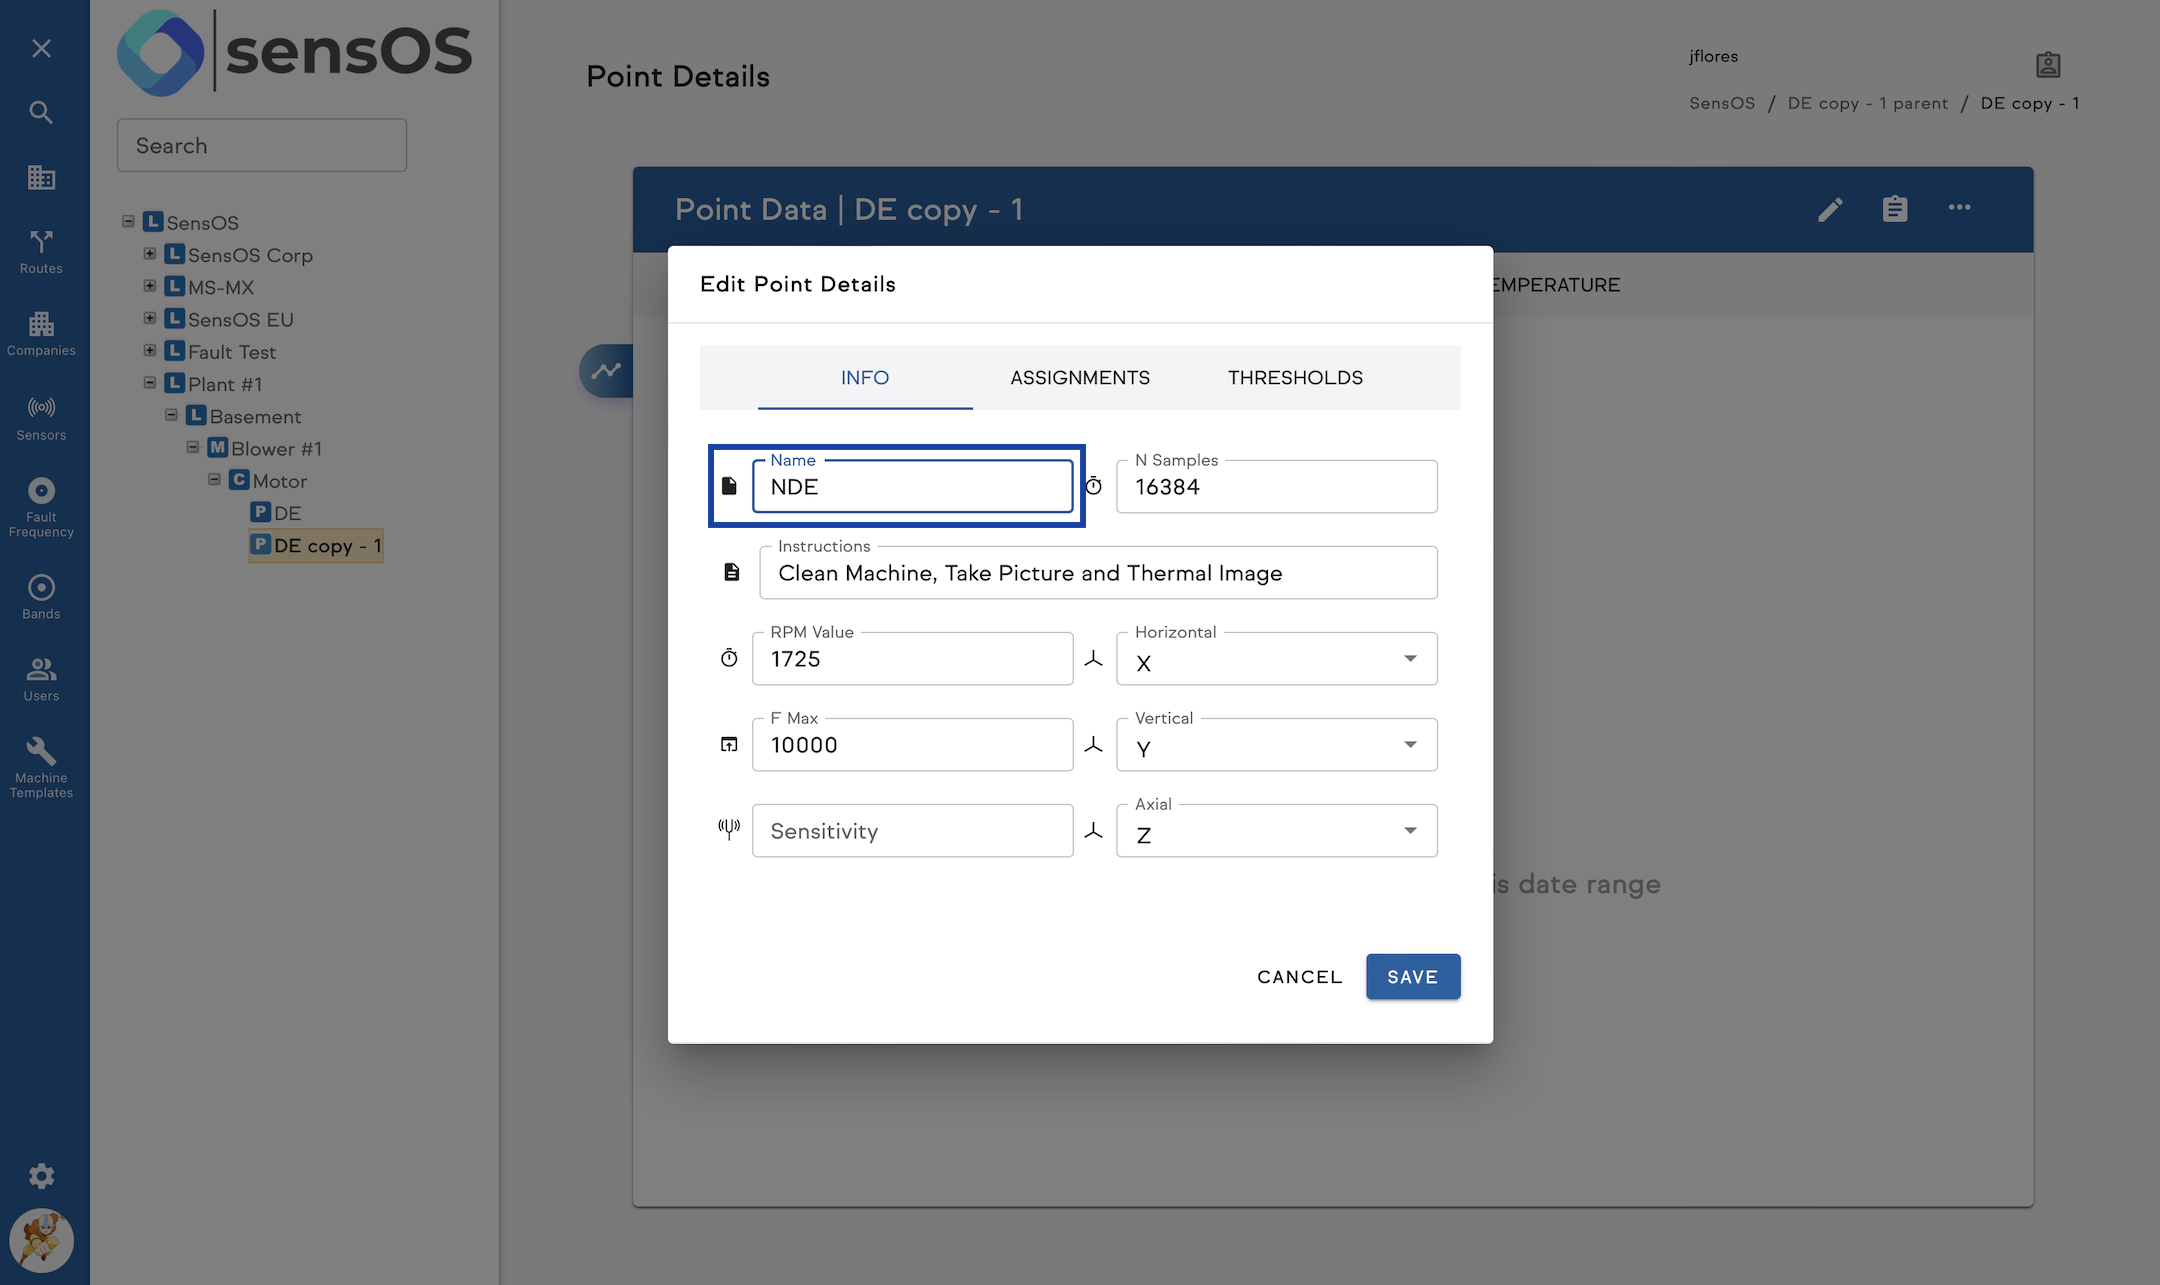
- Any Point/Component/Machine/Location can be cloned although SensOS recommends using the cloning feature for Points. To clone right-click on asset and select Clone, confirm Asset Copy, Change Name and Save.


Machine Templates
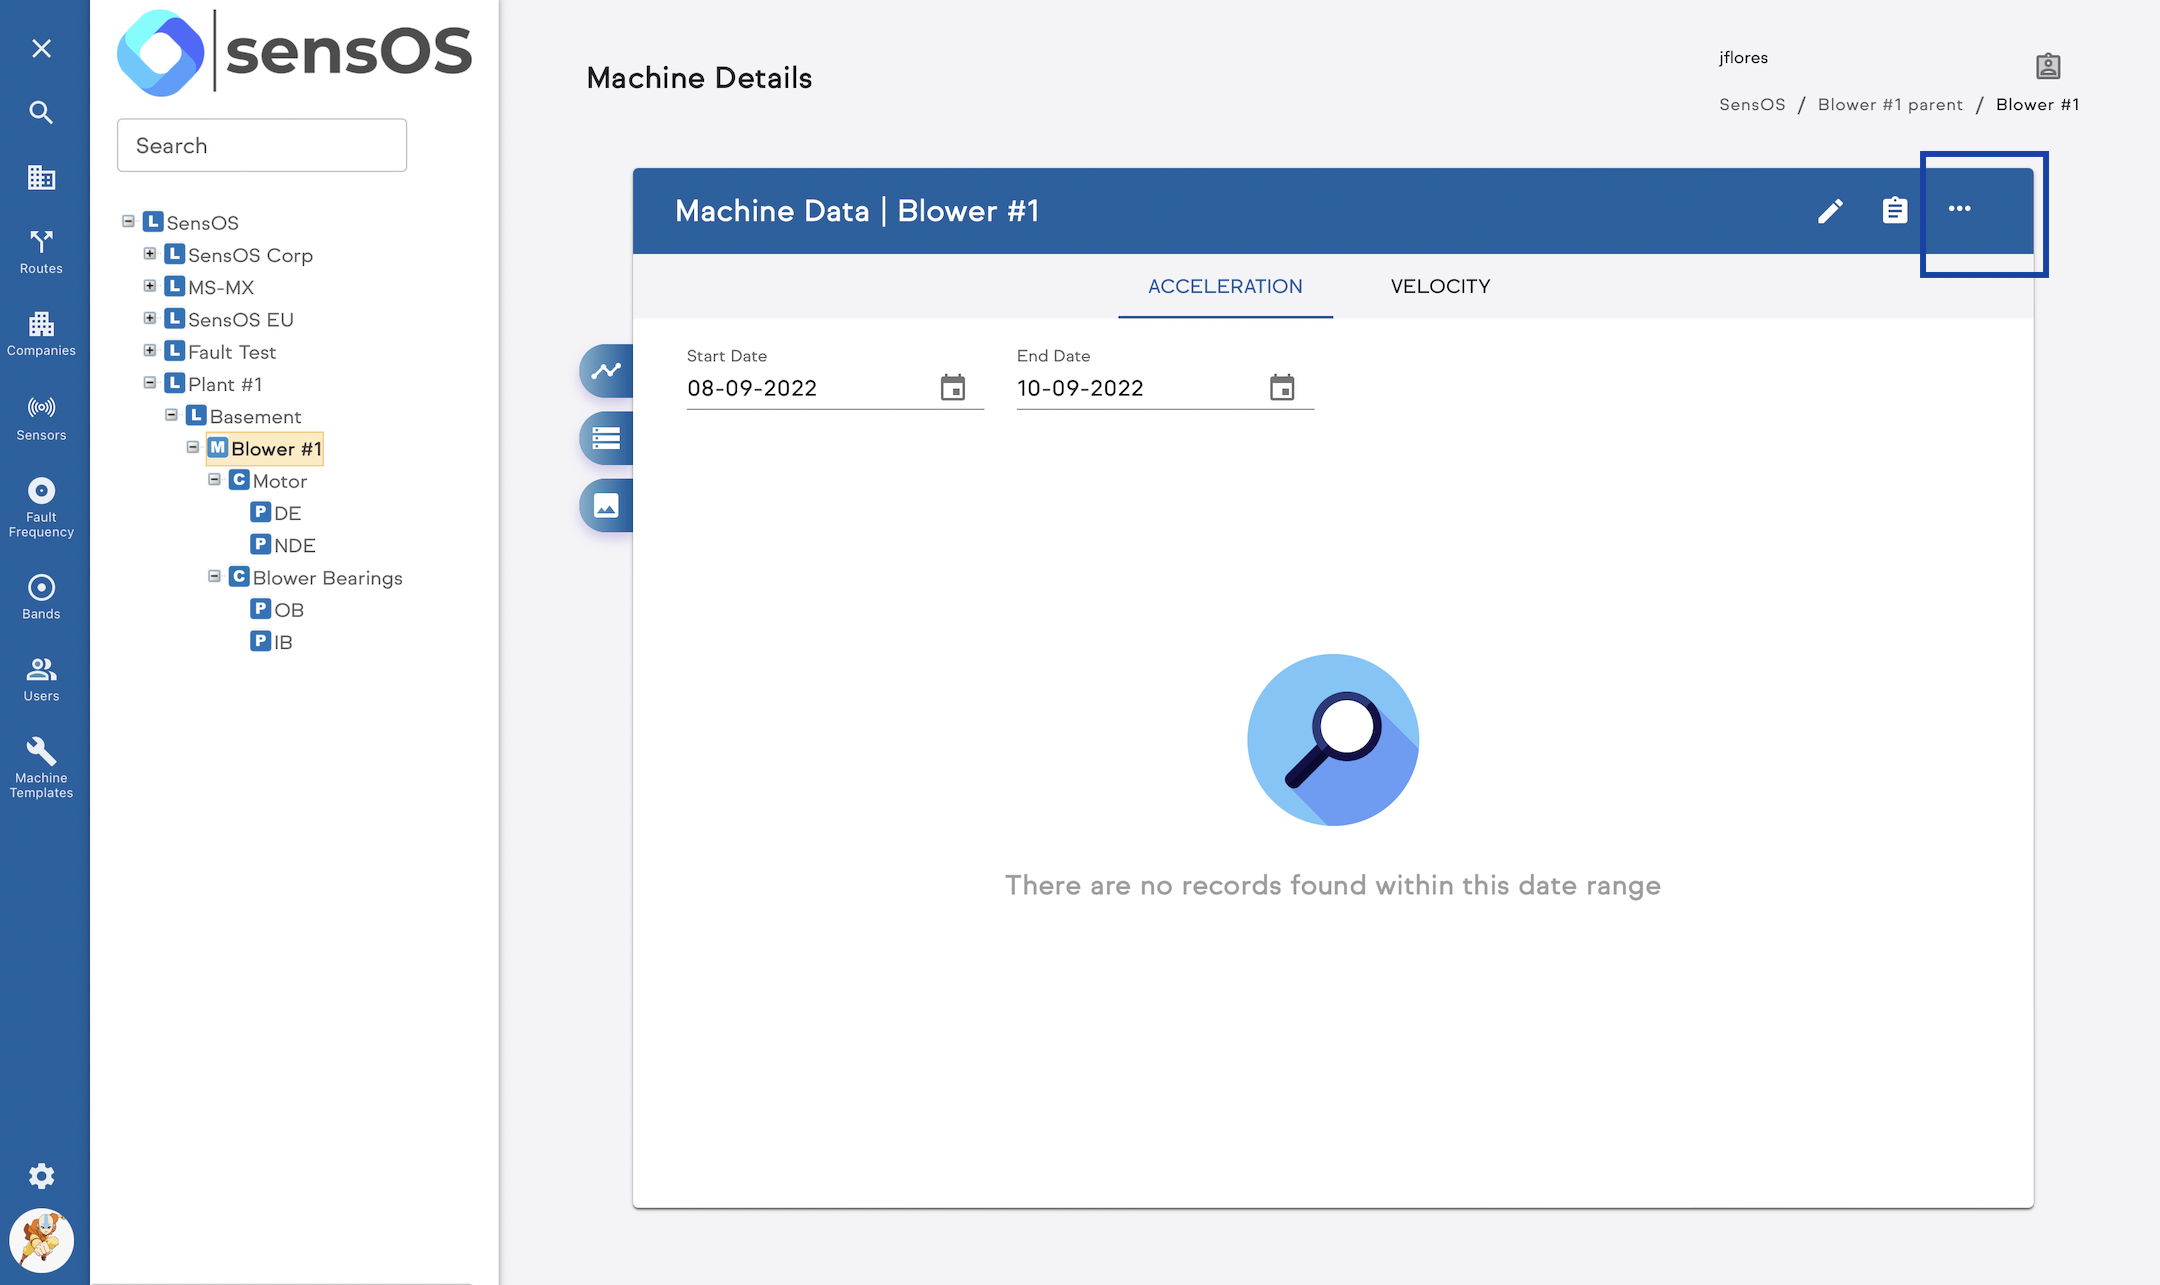
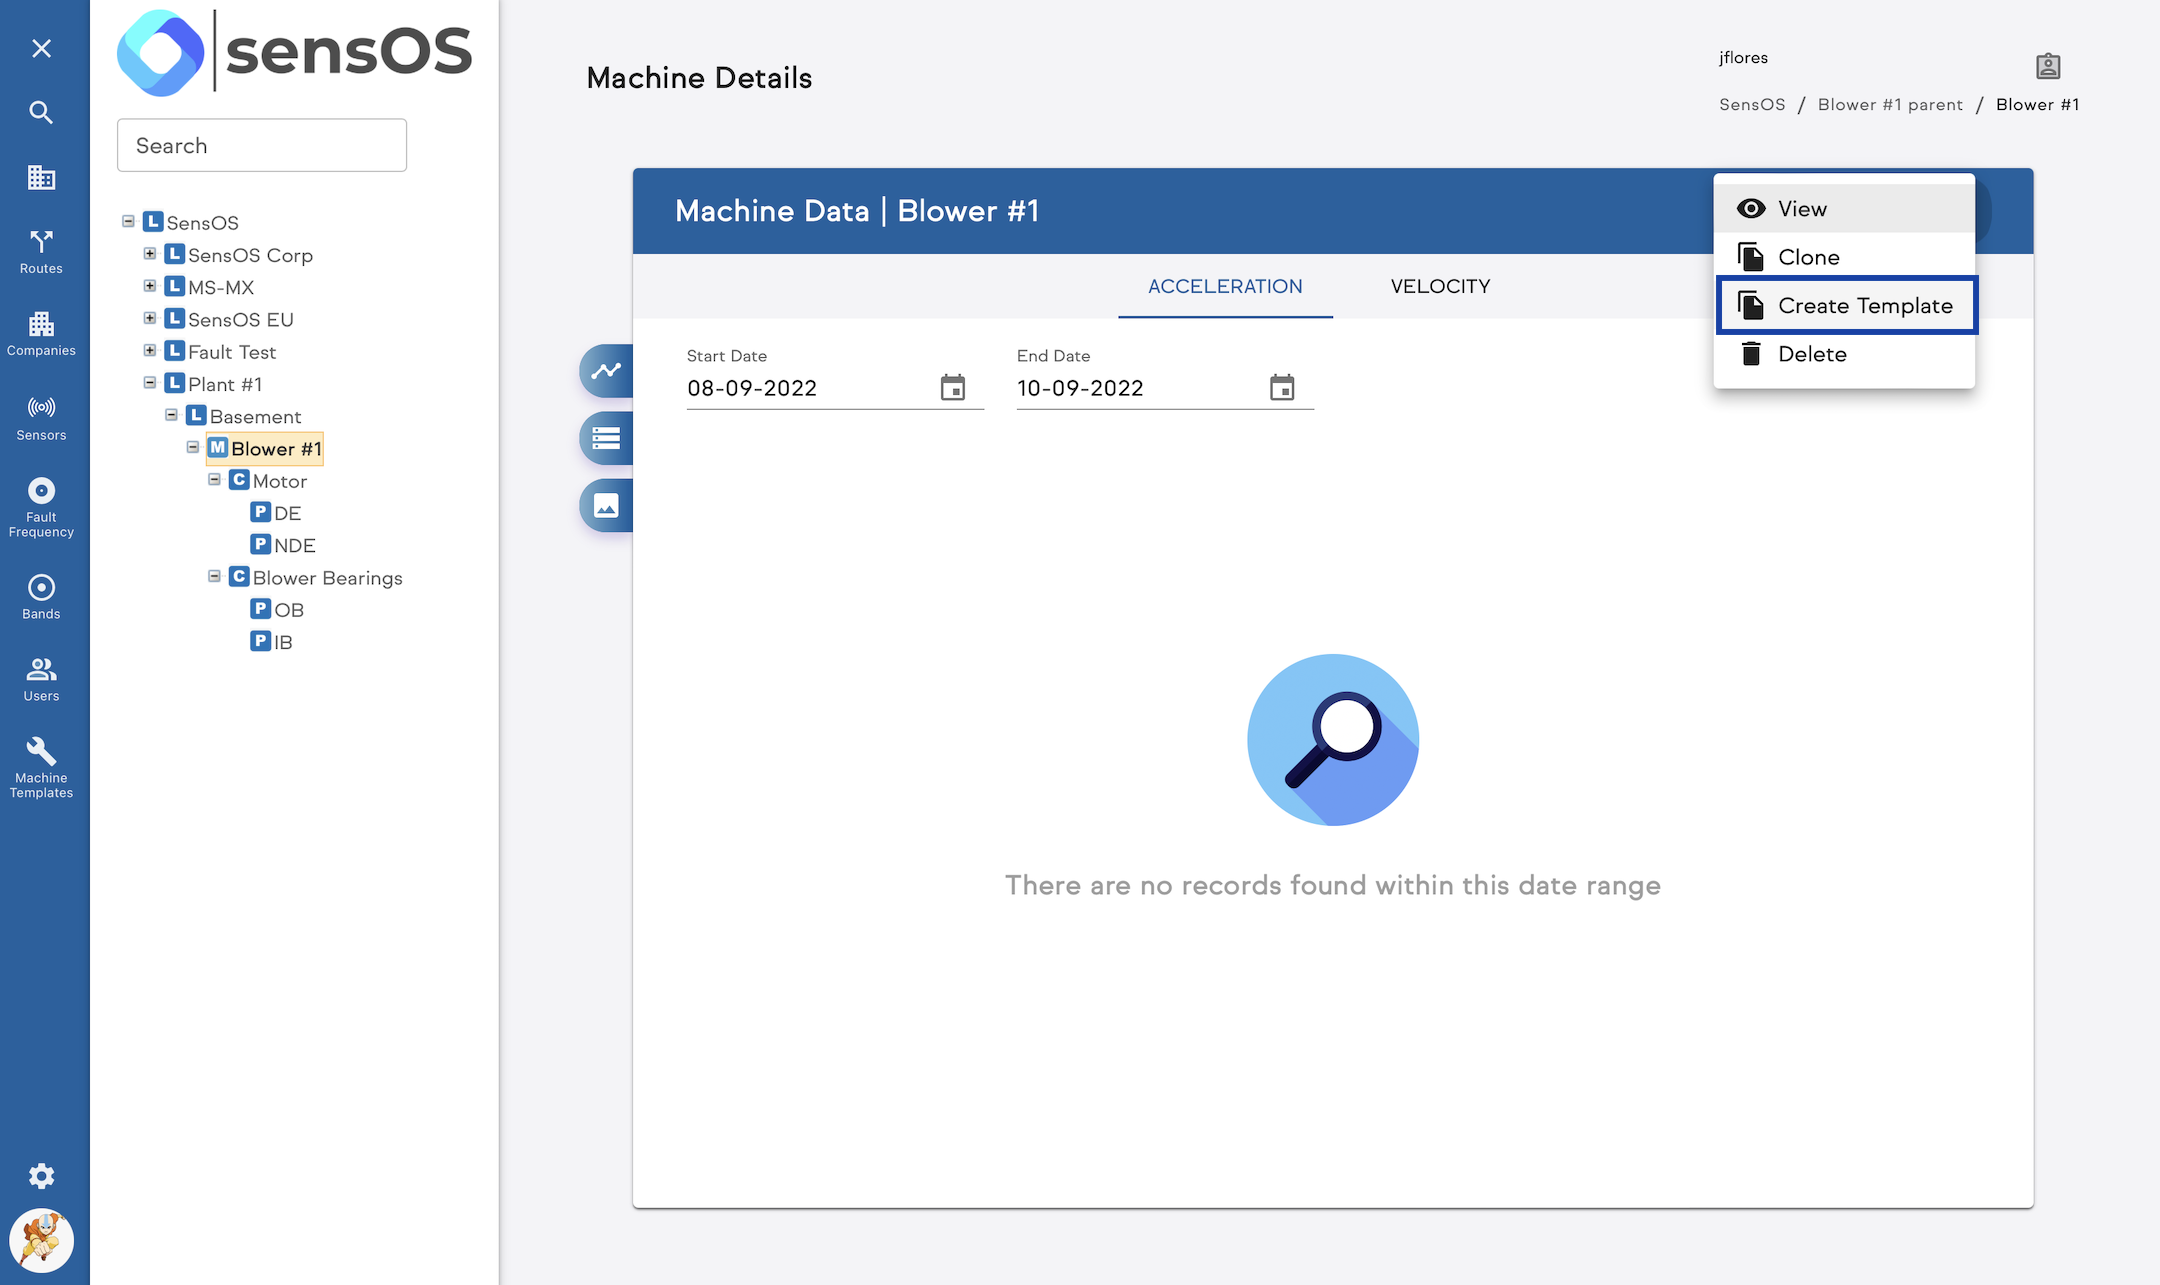
- Machine Templates can be created to Expedite the process of populating Machine Hierarchy, when a machine is fully defined with Components and/or Points, Thresholds, Instructions, etc that user wishes to converto to Template, user can click on the three dots (...) Button on the upper right corner and click on "Create Template"
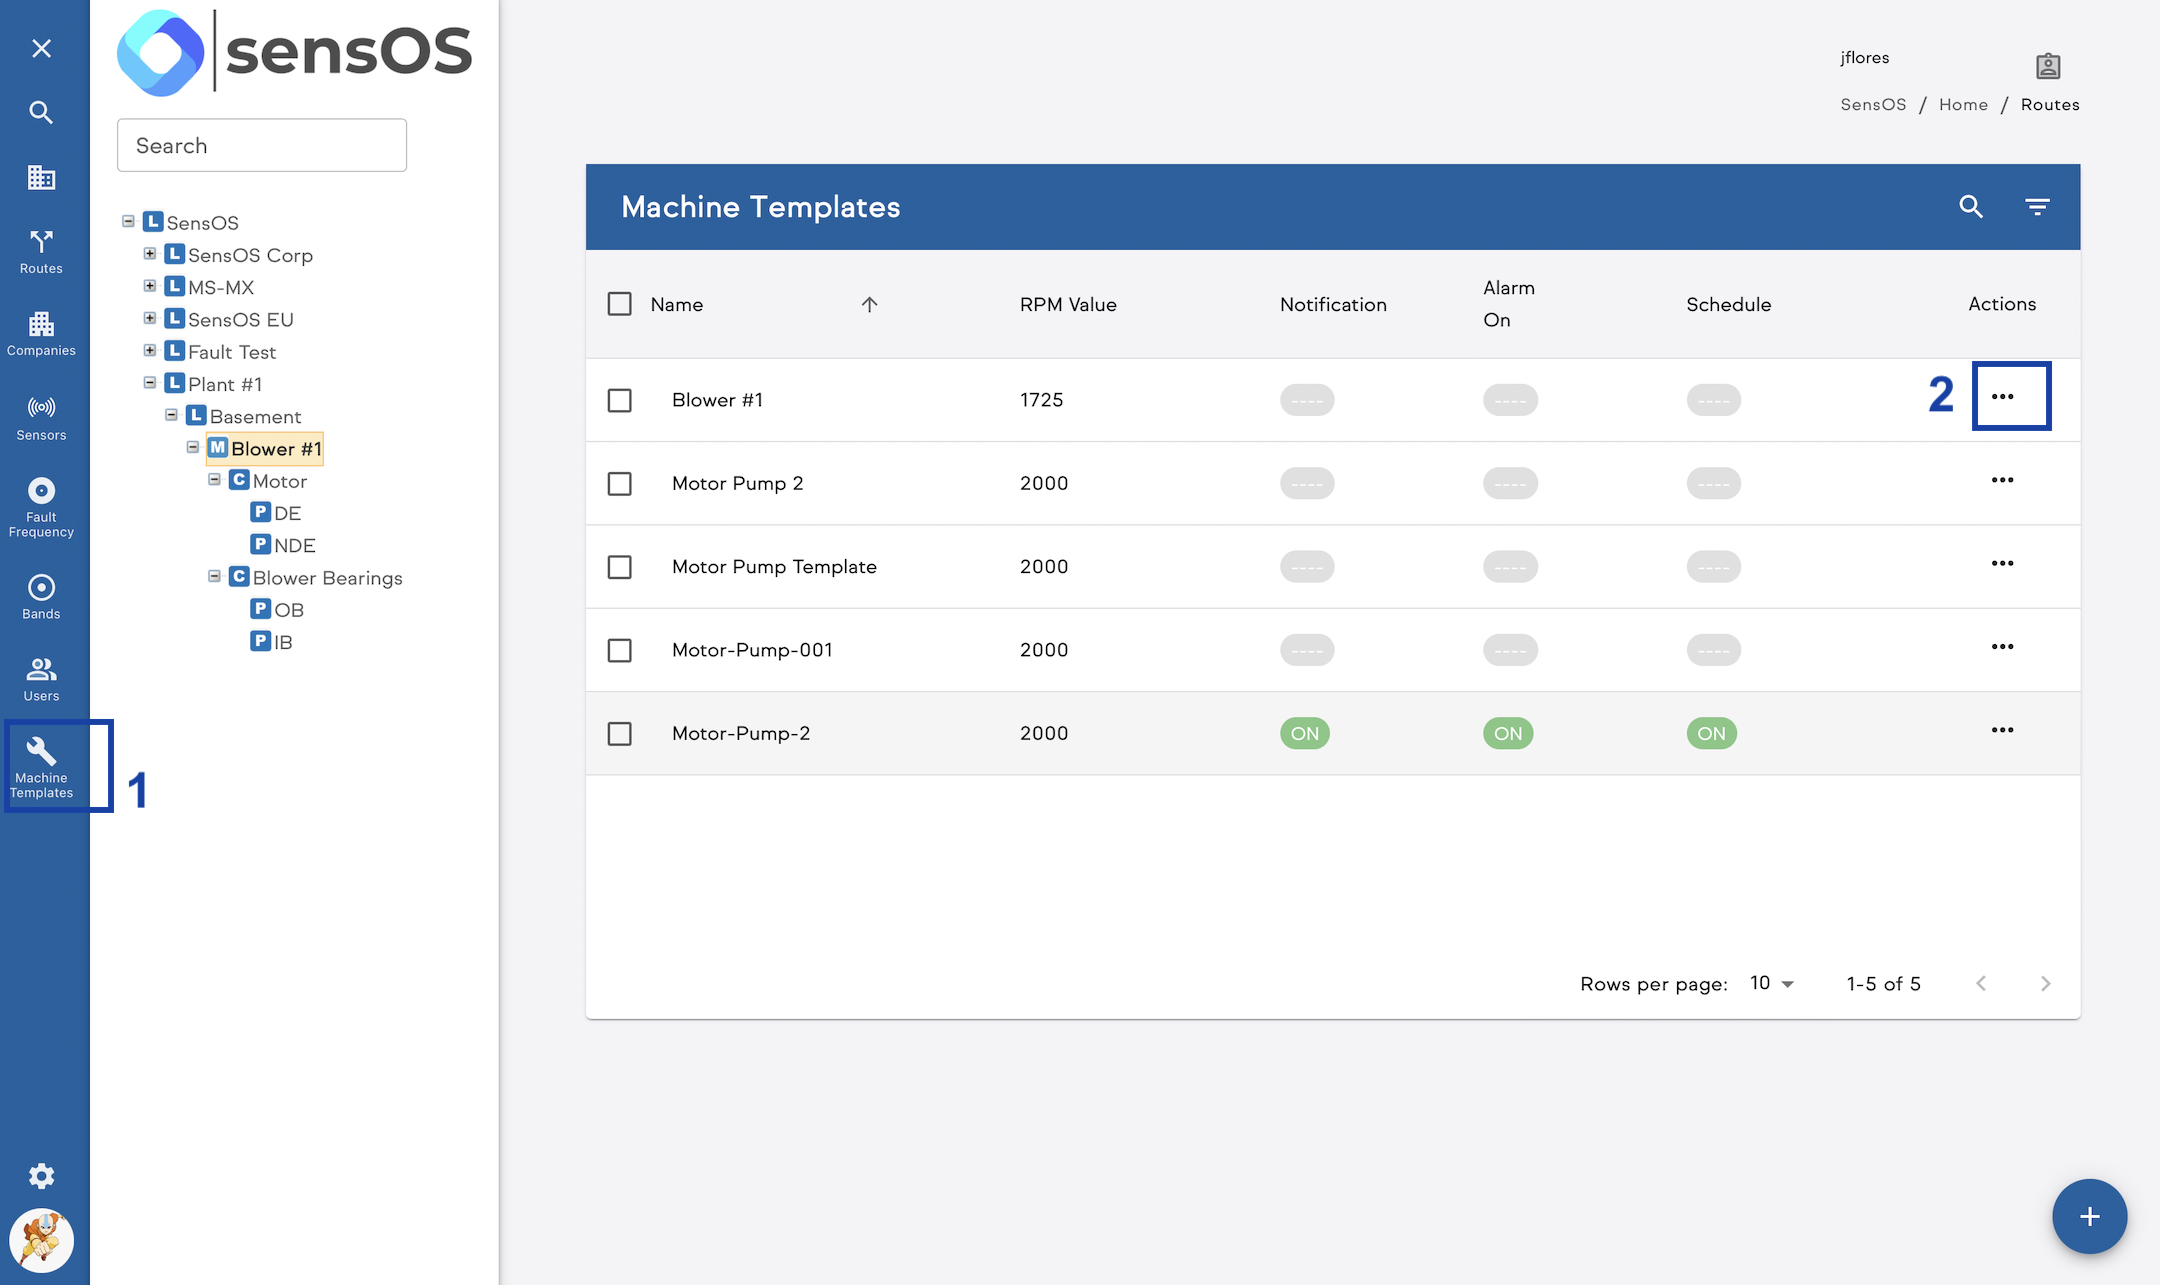
- Click on "Machine Templates" menu to the left and find Template that was recently created, then click on the three dots (...) Button next to Edit Template Name.
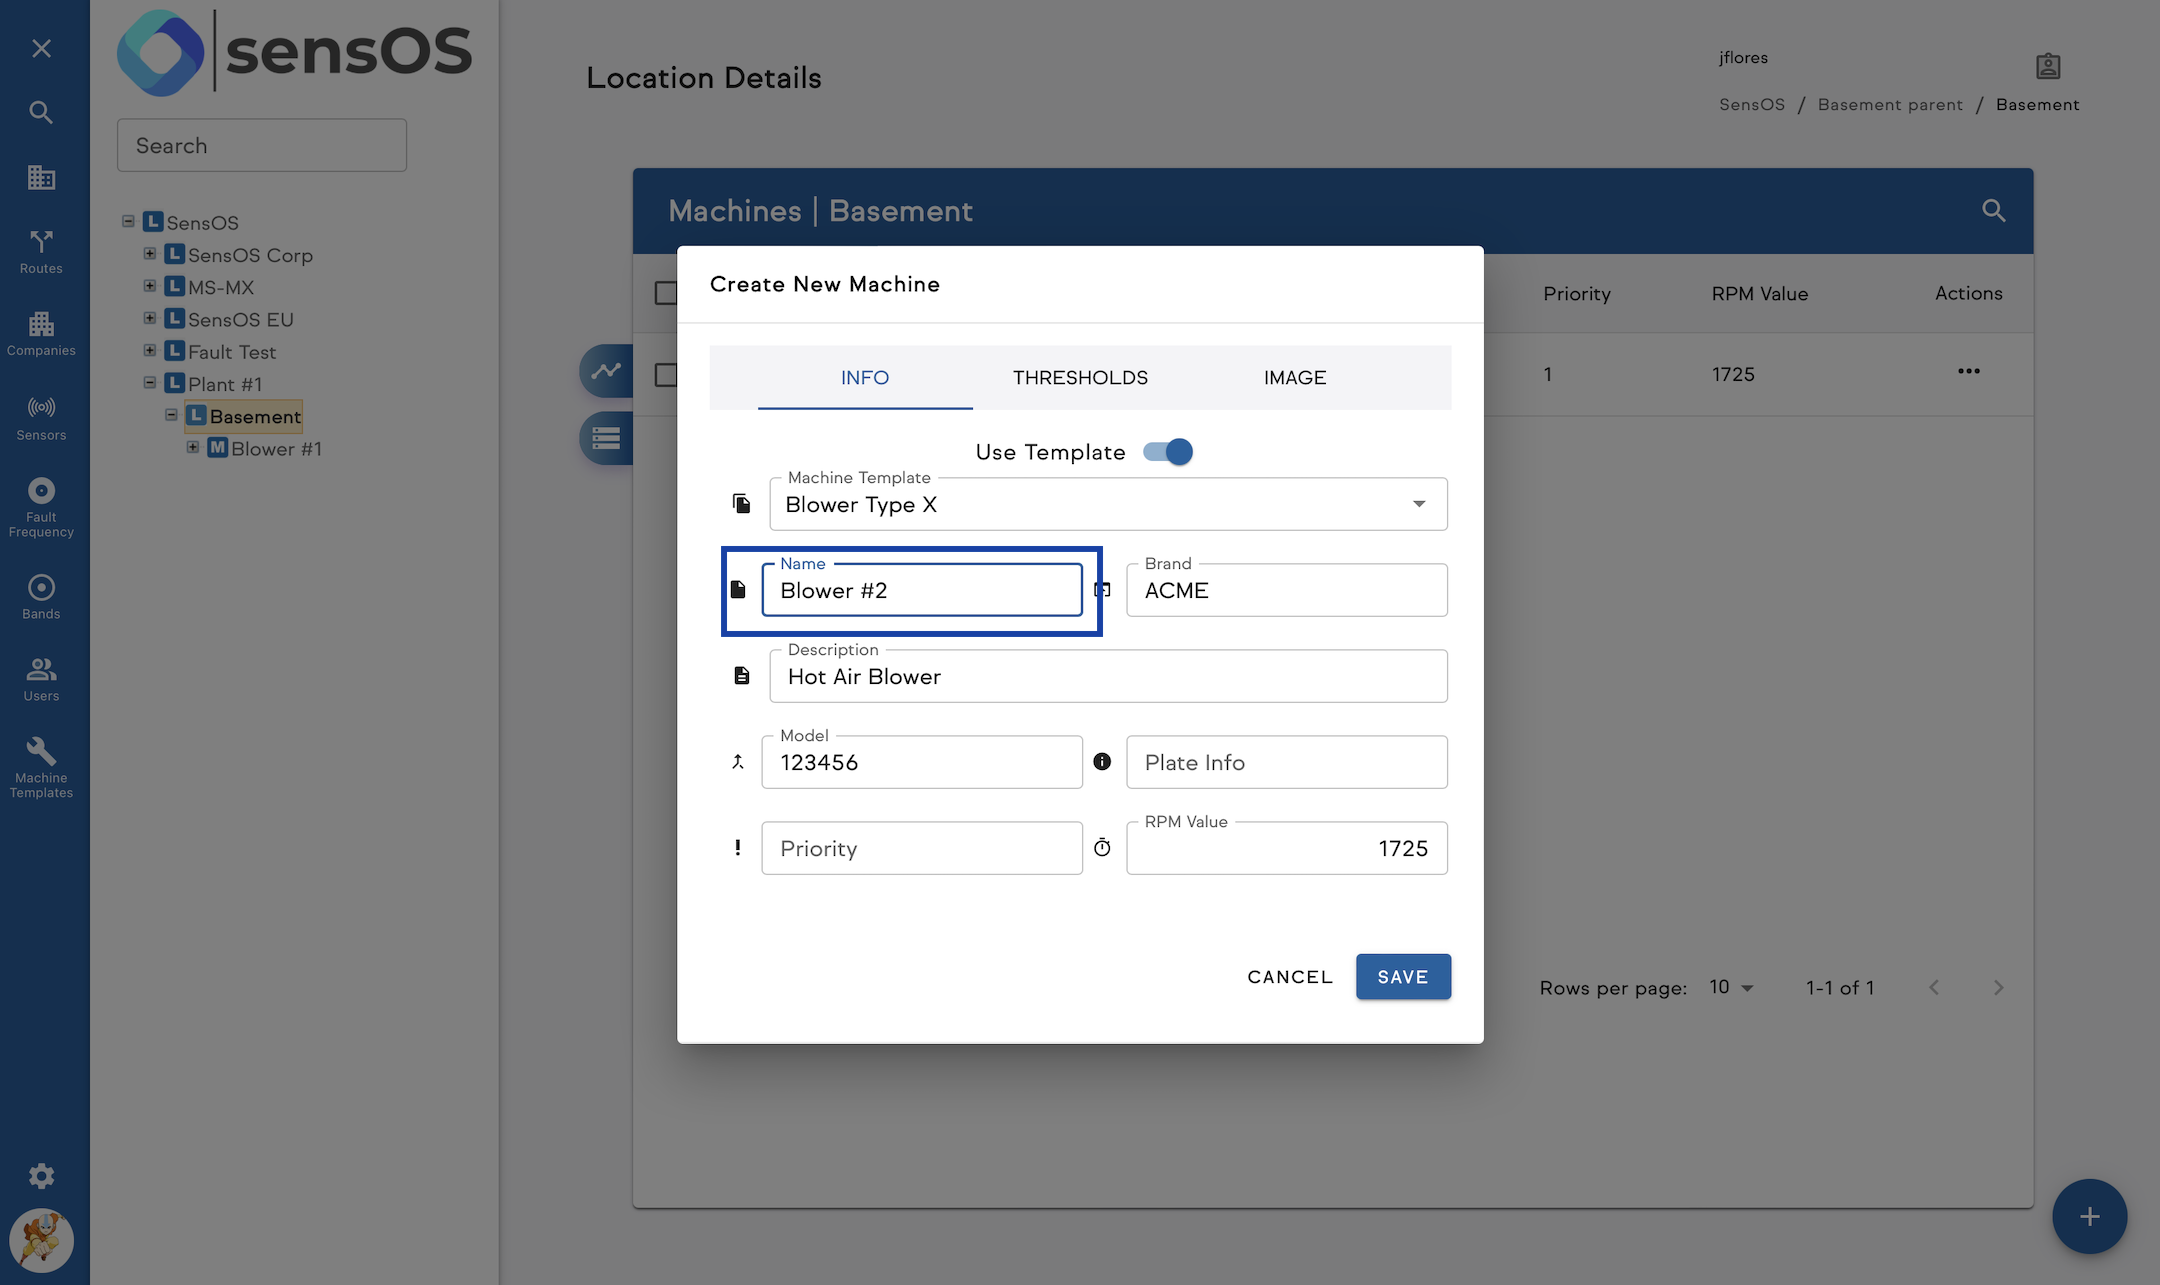
- To create a new Machine using a Template click on "Add Location" as described above and the toggle the "Use Template" Switch On, Select Template from Drop-down Menu, Change Name and Save.


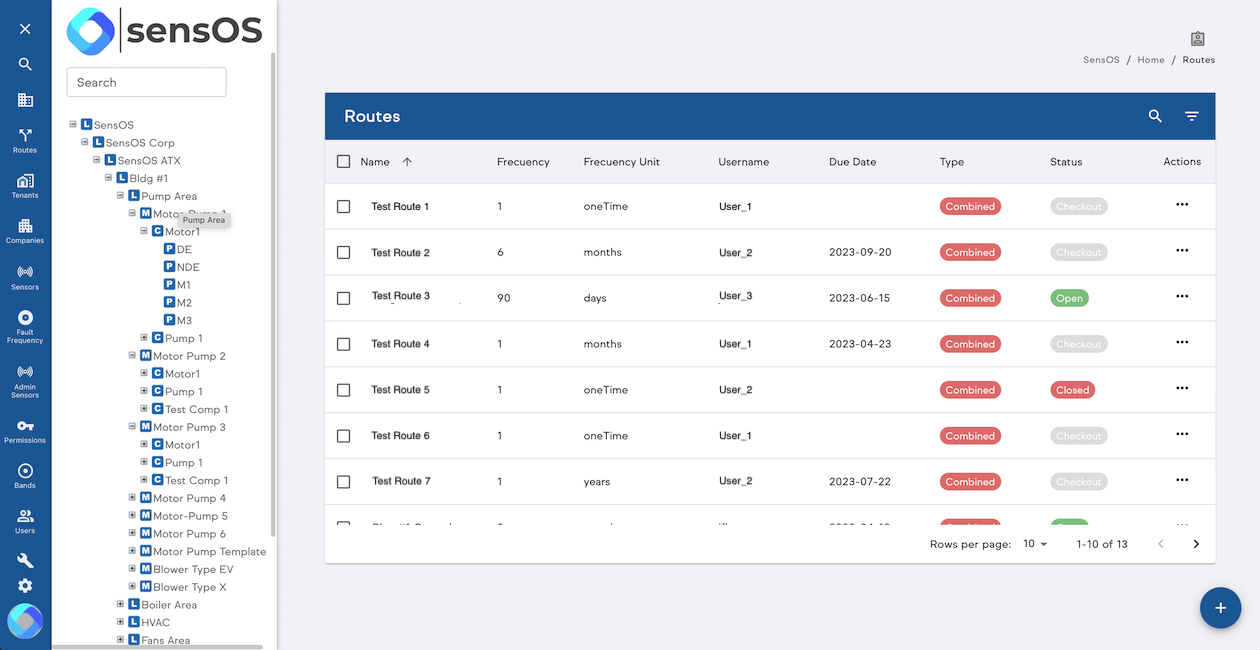
Creating Routes
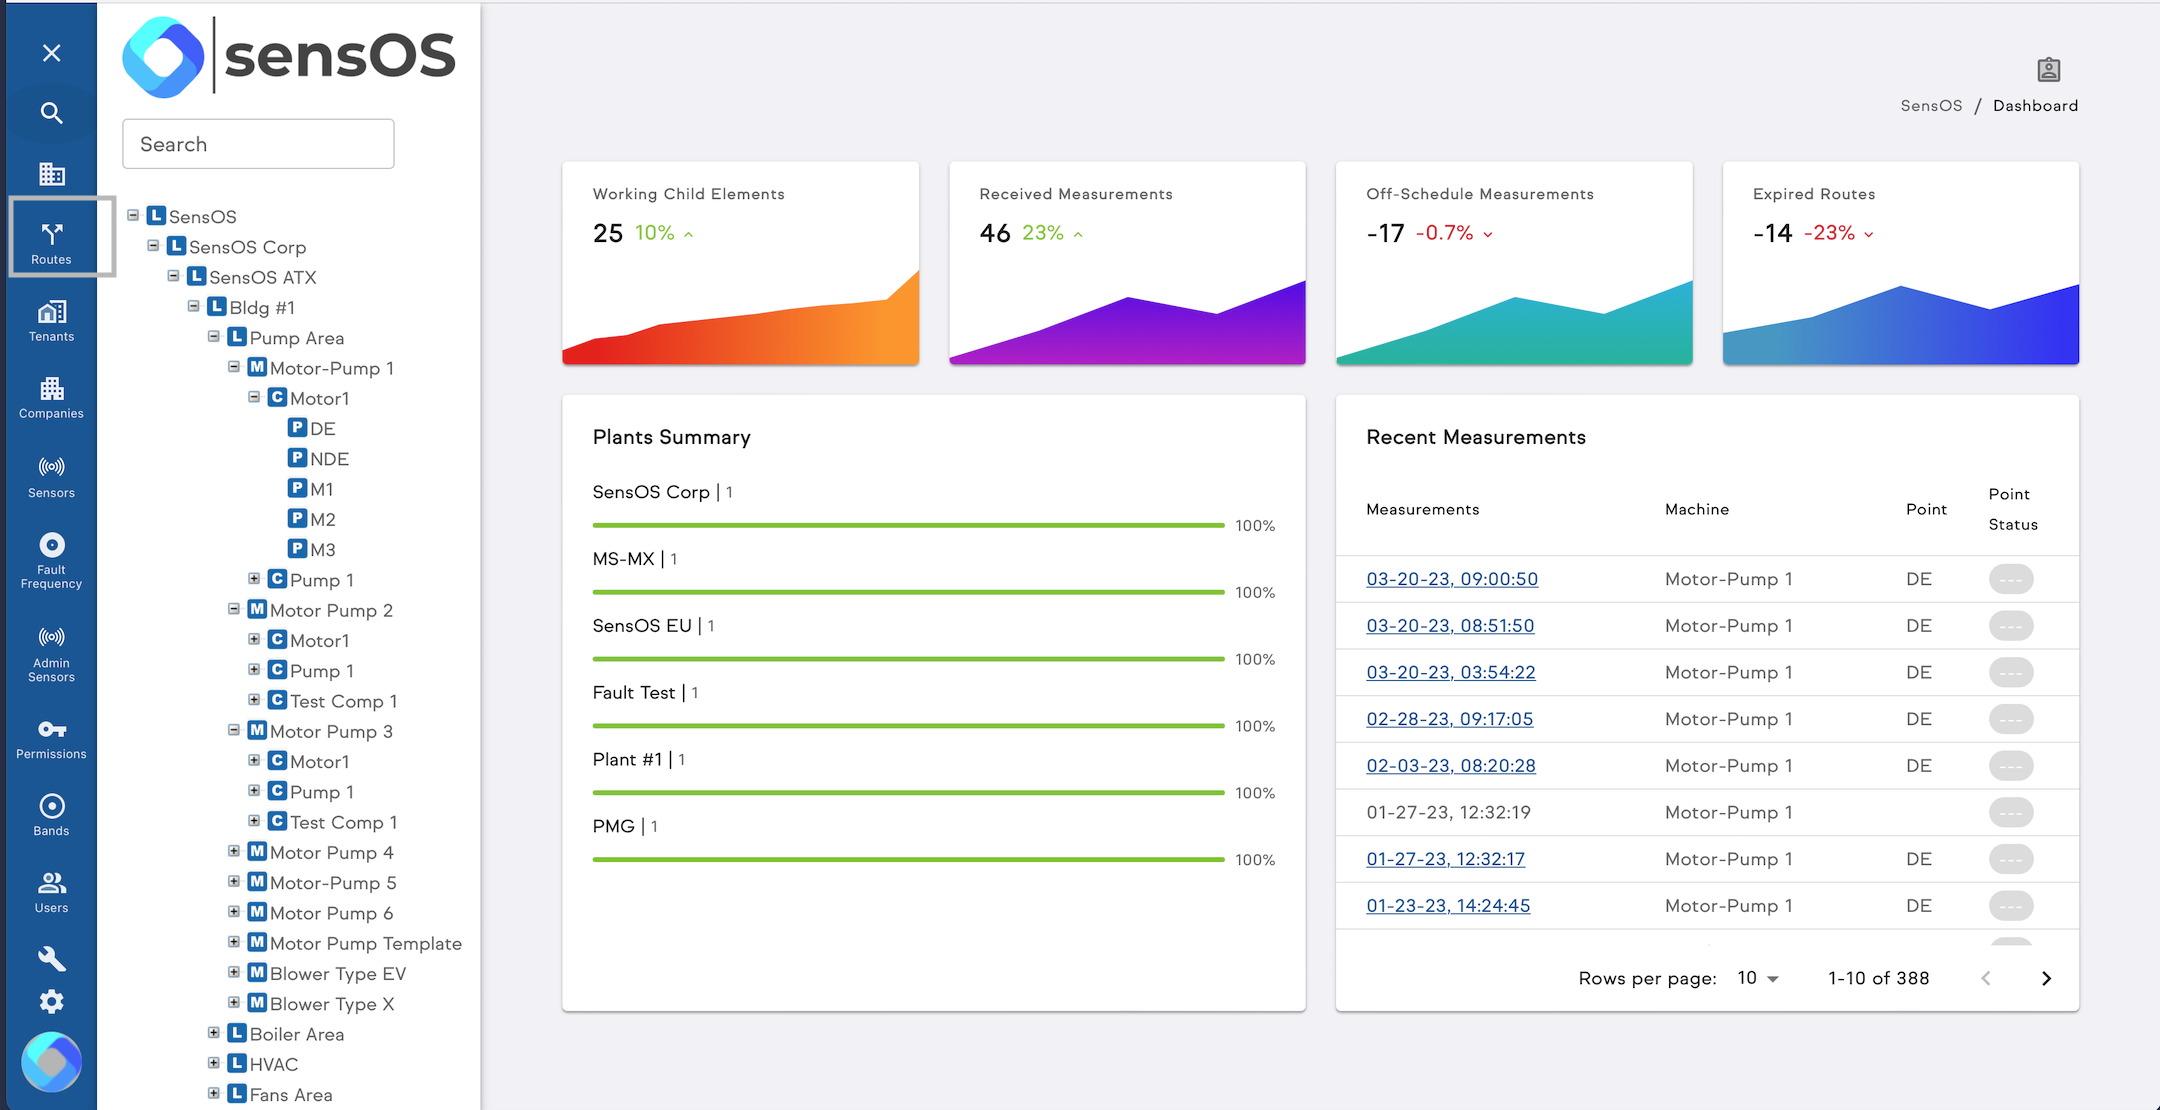
- To create a route for a portable data collector user, click the "Routes" button on the left menu.
- Click on Add a new Route (+ Button) or click more actions on the right side to edit or delete an existing route
- Select the points to be included in the route from the hierarchy by checking an entire location or machine, or by indivifualy selecting each point. Type a route name to identify the route and then select the user from the dropdown menu. Add the route frequency and type, then set an initial date and a final date. Click Save, the route will be now avaialble for the specified user on the portable device using the MS-2234 app. (sse item 2 - Routes Dashboard in the MS-2234 Route Data Collector App Documentation)

Changelog
See what's new added, changed, fixed, improved or updated in the latest versions.
Version 1.02 (22 Nov, 2022)
- Added Modular Login Access
Version 1.01 (04 Feb, 2022)
Initial Release